sunrise scramble | columbia peak overnight
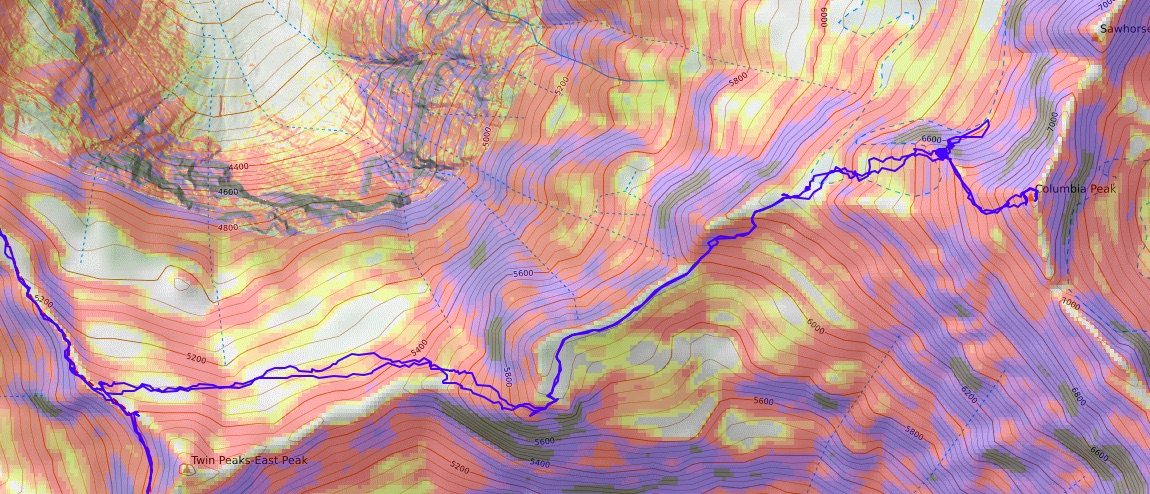
23.5 miles . 6600 ft gain . 7172 ft high
Henry M. Jackson Wilderness
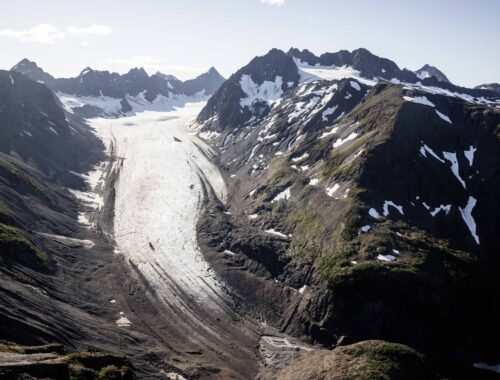
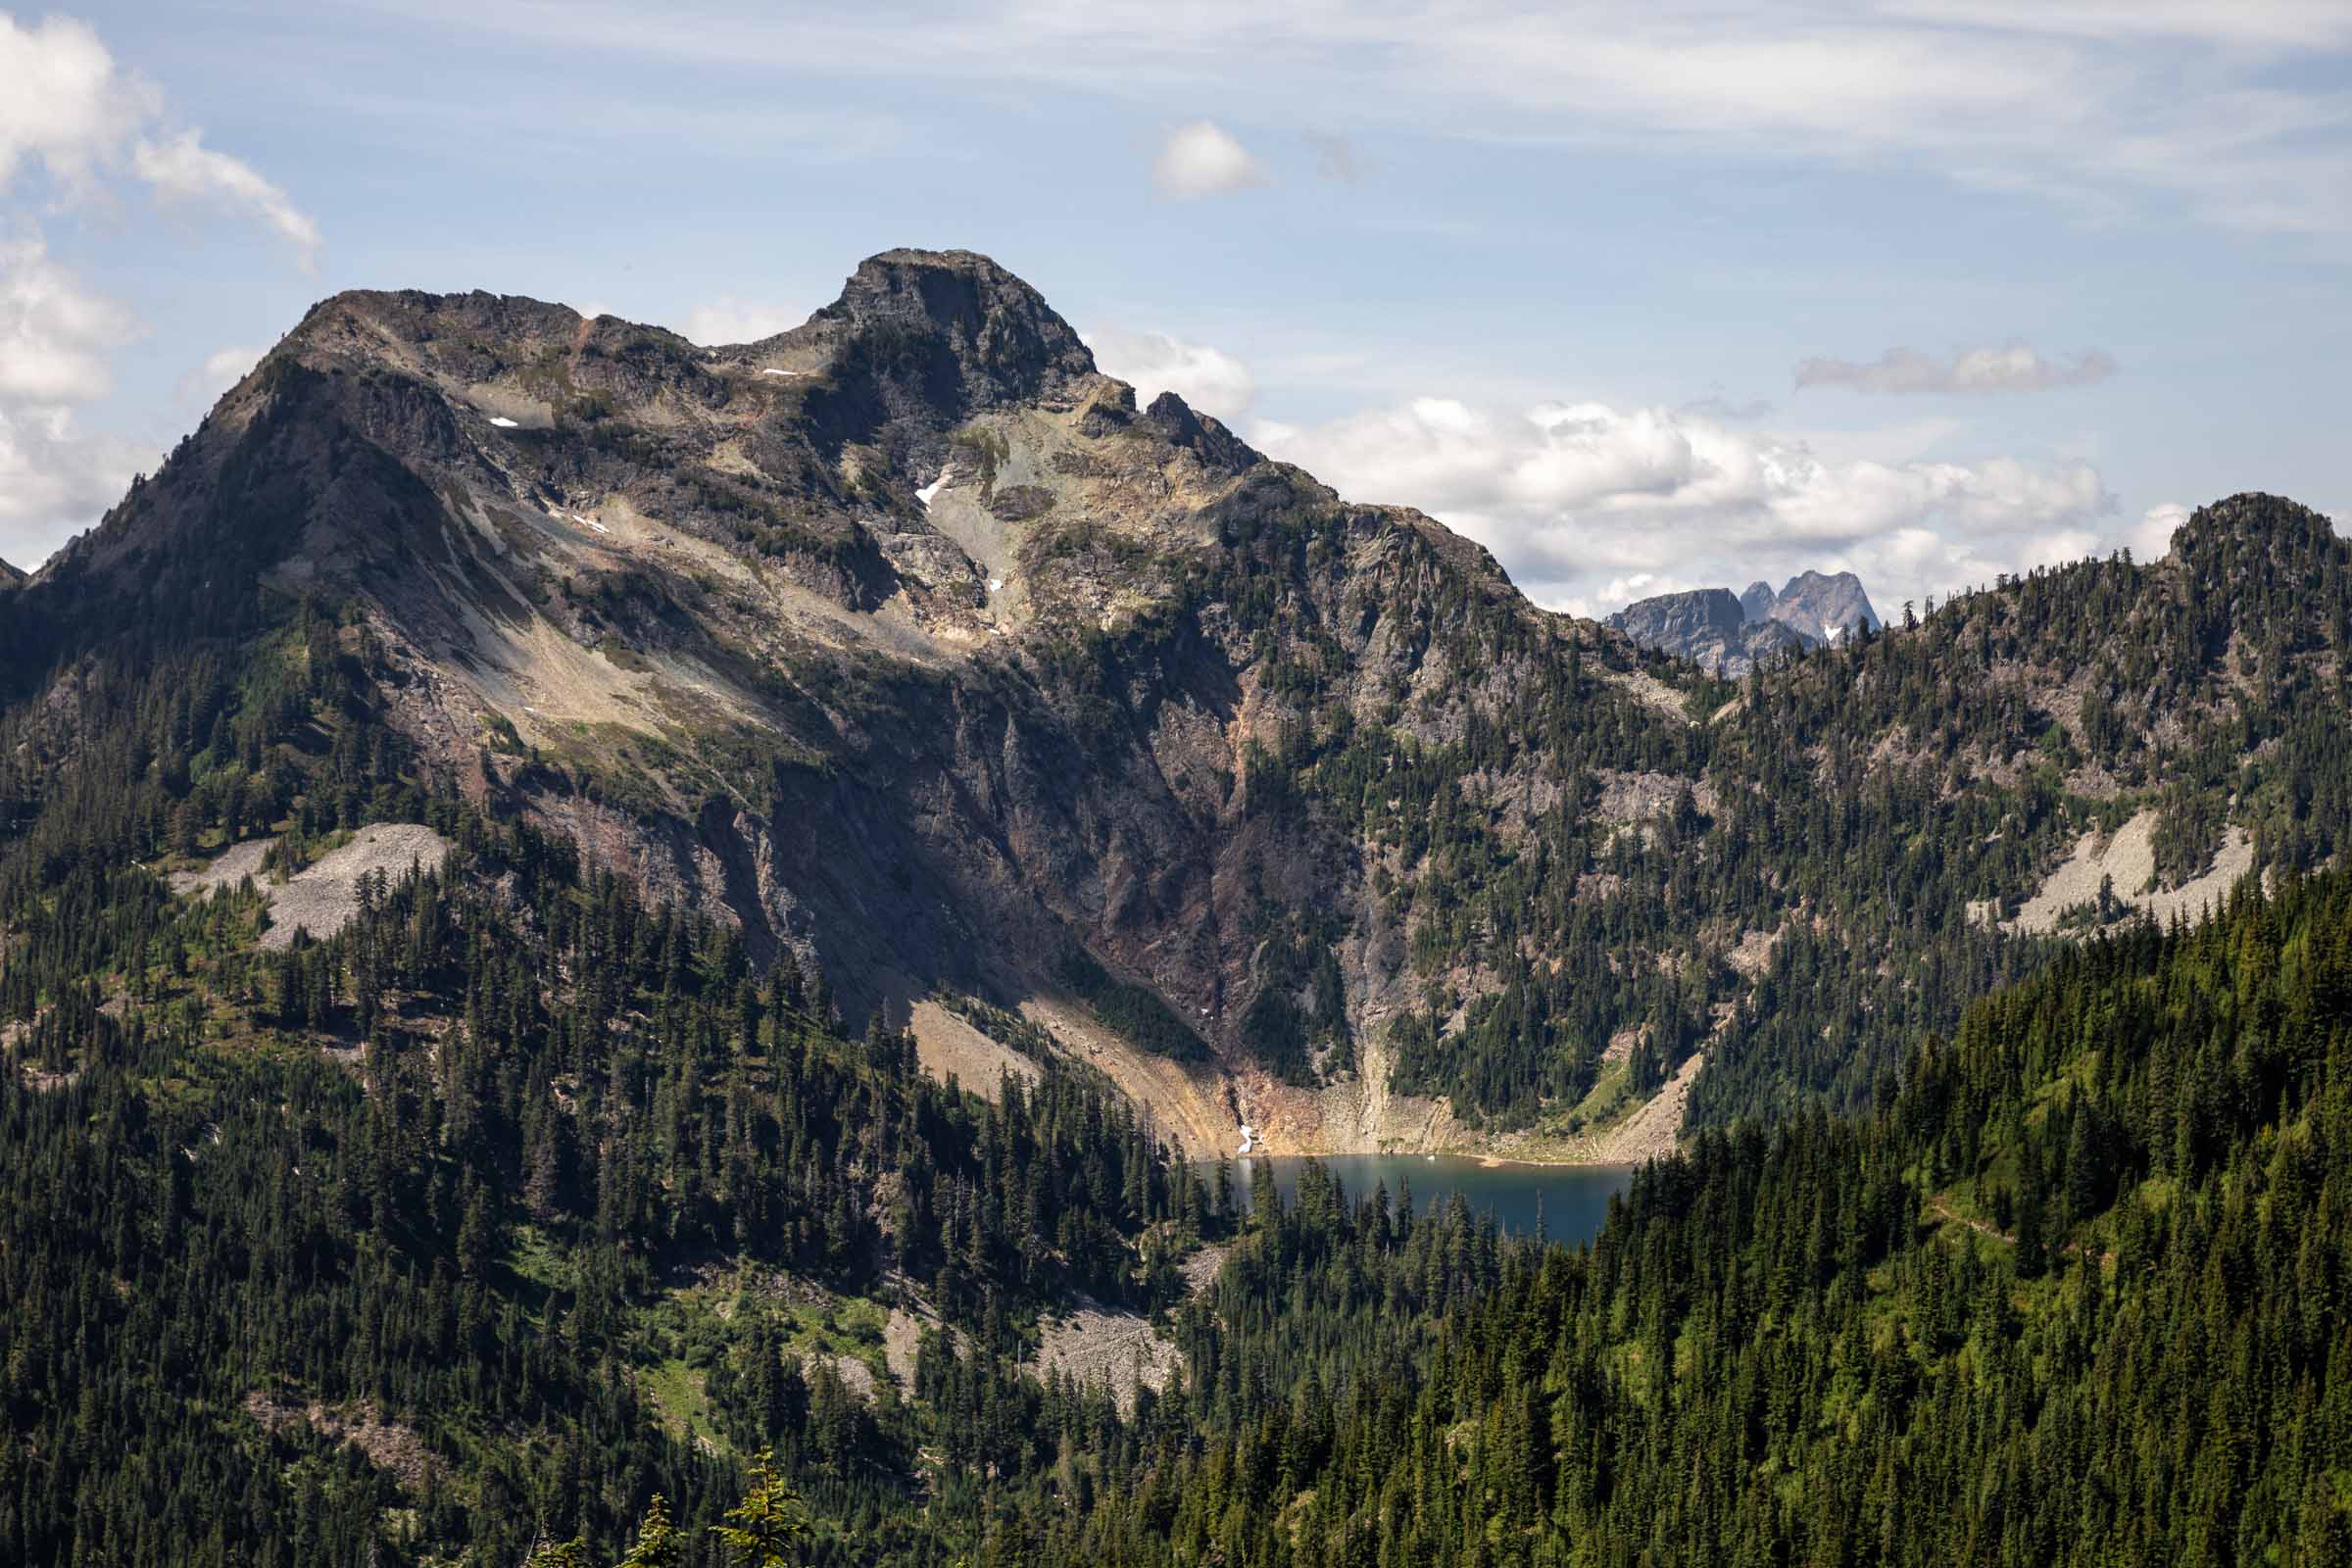
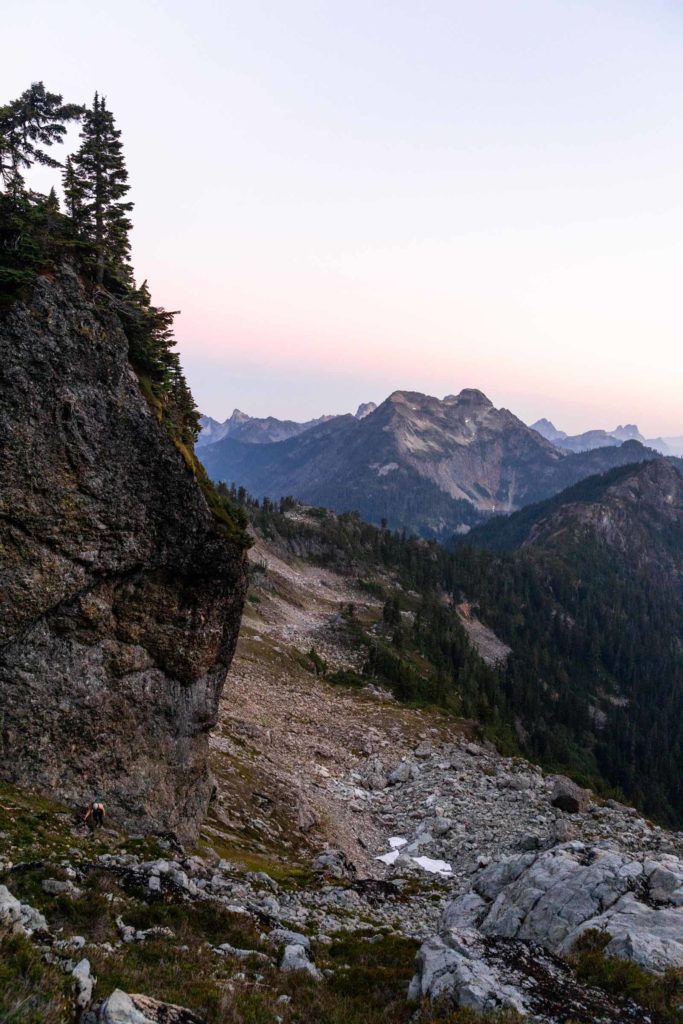
Monte Cristo subrange always seems like an elusive area. Hiking to the ghost town itself is already 8 miles round trip, through on relatively flat and well gravel paved hiking path. You can also approach it from Blanca Lake which gains steeply but is yet another 8 mile round trip to the base of any climb, though now you’ll have gotten more elevation in at this point. Due to its remoteness, I think Columbia sees fewer people looking to summit it. I didn’t even find a summit registry! Perhaps the one “class 4” move makes it sound daunting. But I’m always on the hunt for a solid scramble. I’m not sure that I’d classify Columbia as that, but it is a full on adventure over varied terrain, which is still a fun time in itself.
The Monte Cristo group consists of Kyes, Cadet, Columbia, and its namesake in height order with plenty of smaller sub peaks in between. Kyes is the tallest and dominating view from Blanca Lake while Columbia is hidden from view. However, from other peaks like Sloan or the newly developed Frog Mountain trail, you can clearly see the different peaks of this subrange.

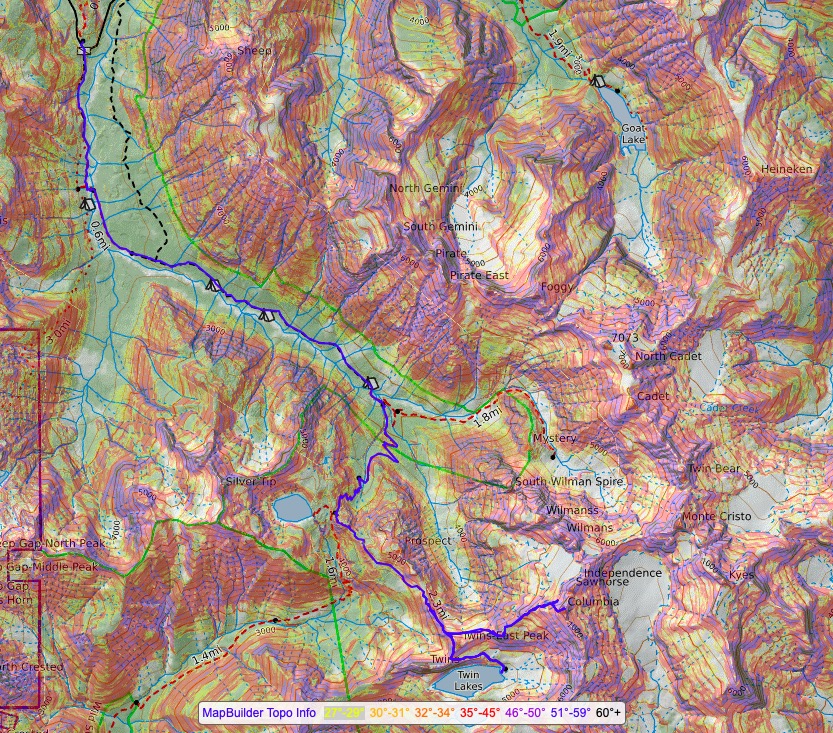
We met up at the Barlow Pass Trailhead at 8am on a Saturday and there was still plenty of parking. Little tip: if you see cars lined up on the side of the road, it doesn’t mean there’s no parking ahead, so check! It took just a mile or so before we passed the turn off to Gothic Basin, where most people are headed. Keep following the trail till it forces you to cross the South Fork Sauk River on well placed logs. Cross again on a bridge built when cars were allowed up here. Now the trail is extra nice in most parts – super wide and well graded all the way to the Monte Cristo ghost town. There’ll be plenty of signs and maps to navigate through the town if you want to check it out too. I neglected to take more pictures on the way up and out. But it’s pretty amazing imagining what life was like here in the late 1800s.
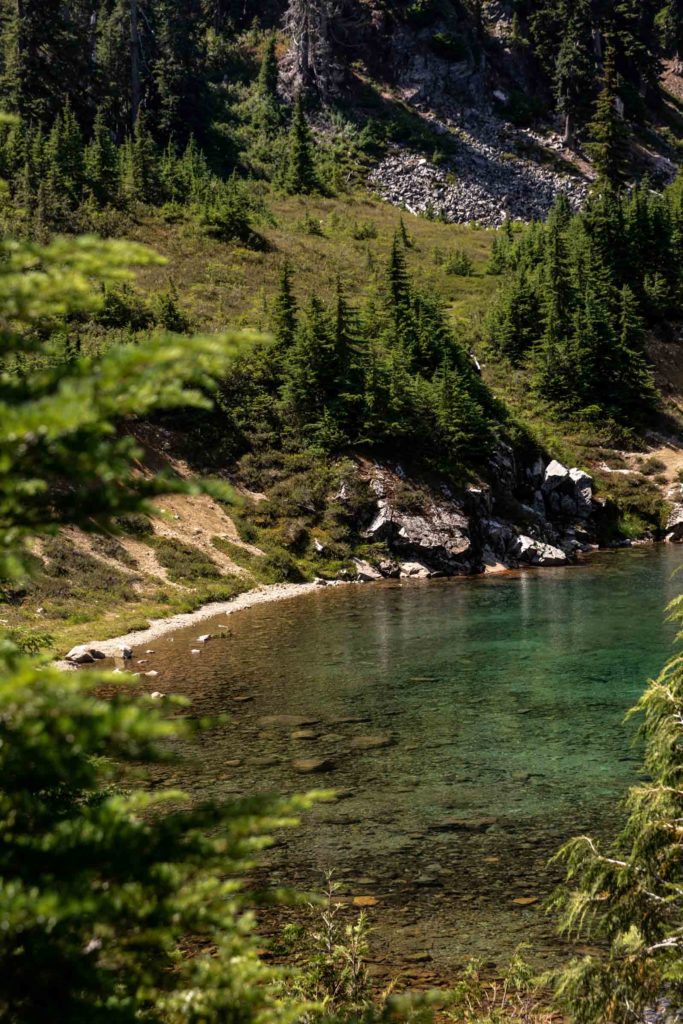
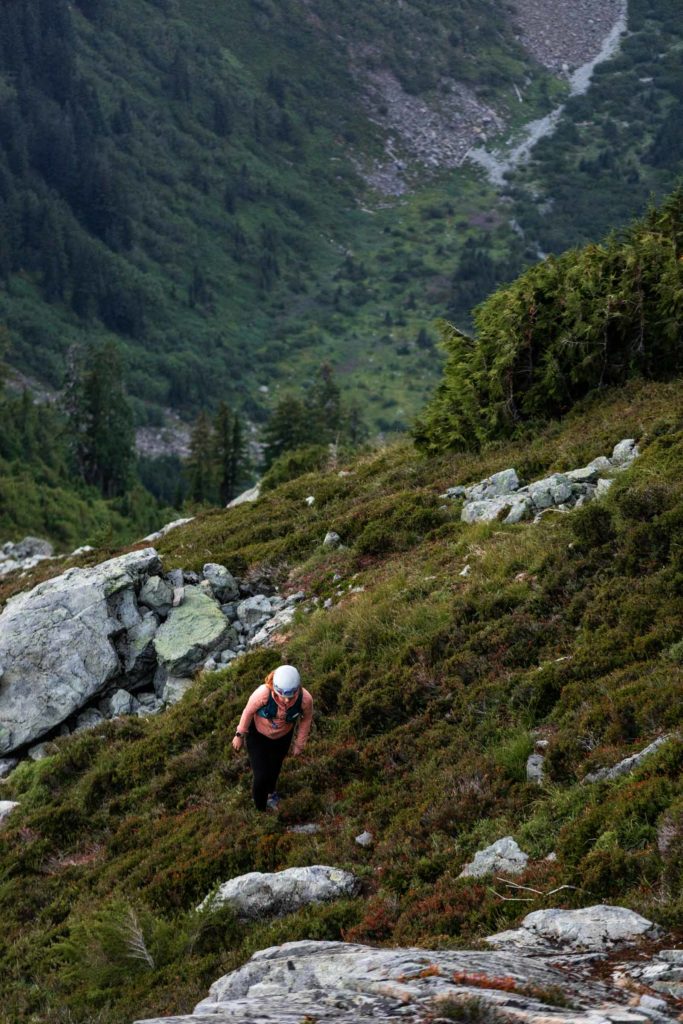
We took a snack break before beginning the true ascent up some switch backs. The trail gains elevation steadily, never more than you can take (at least to us). At poodle pass, you can decide if you want to check out Silver Lake, which is the perfect spot for lunch. It’s a short distance downhill from the pass, but worth it. There was a bear roaming around while we were there and everyone but me had a sighting!
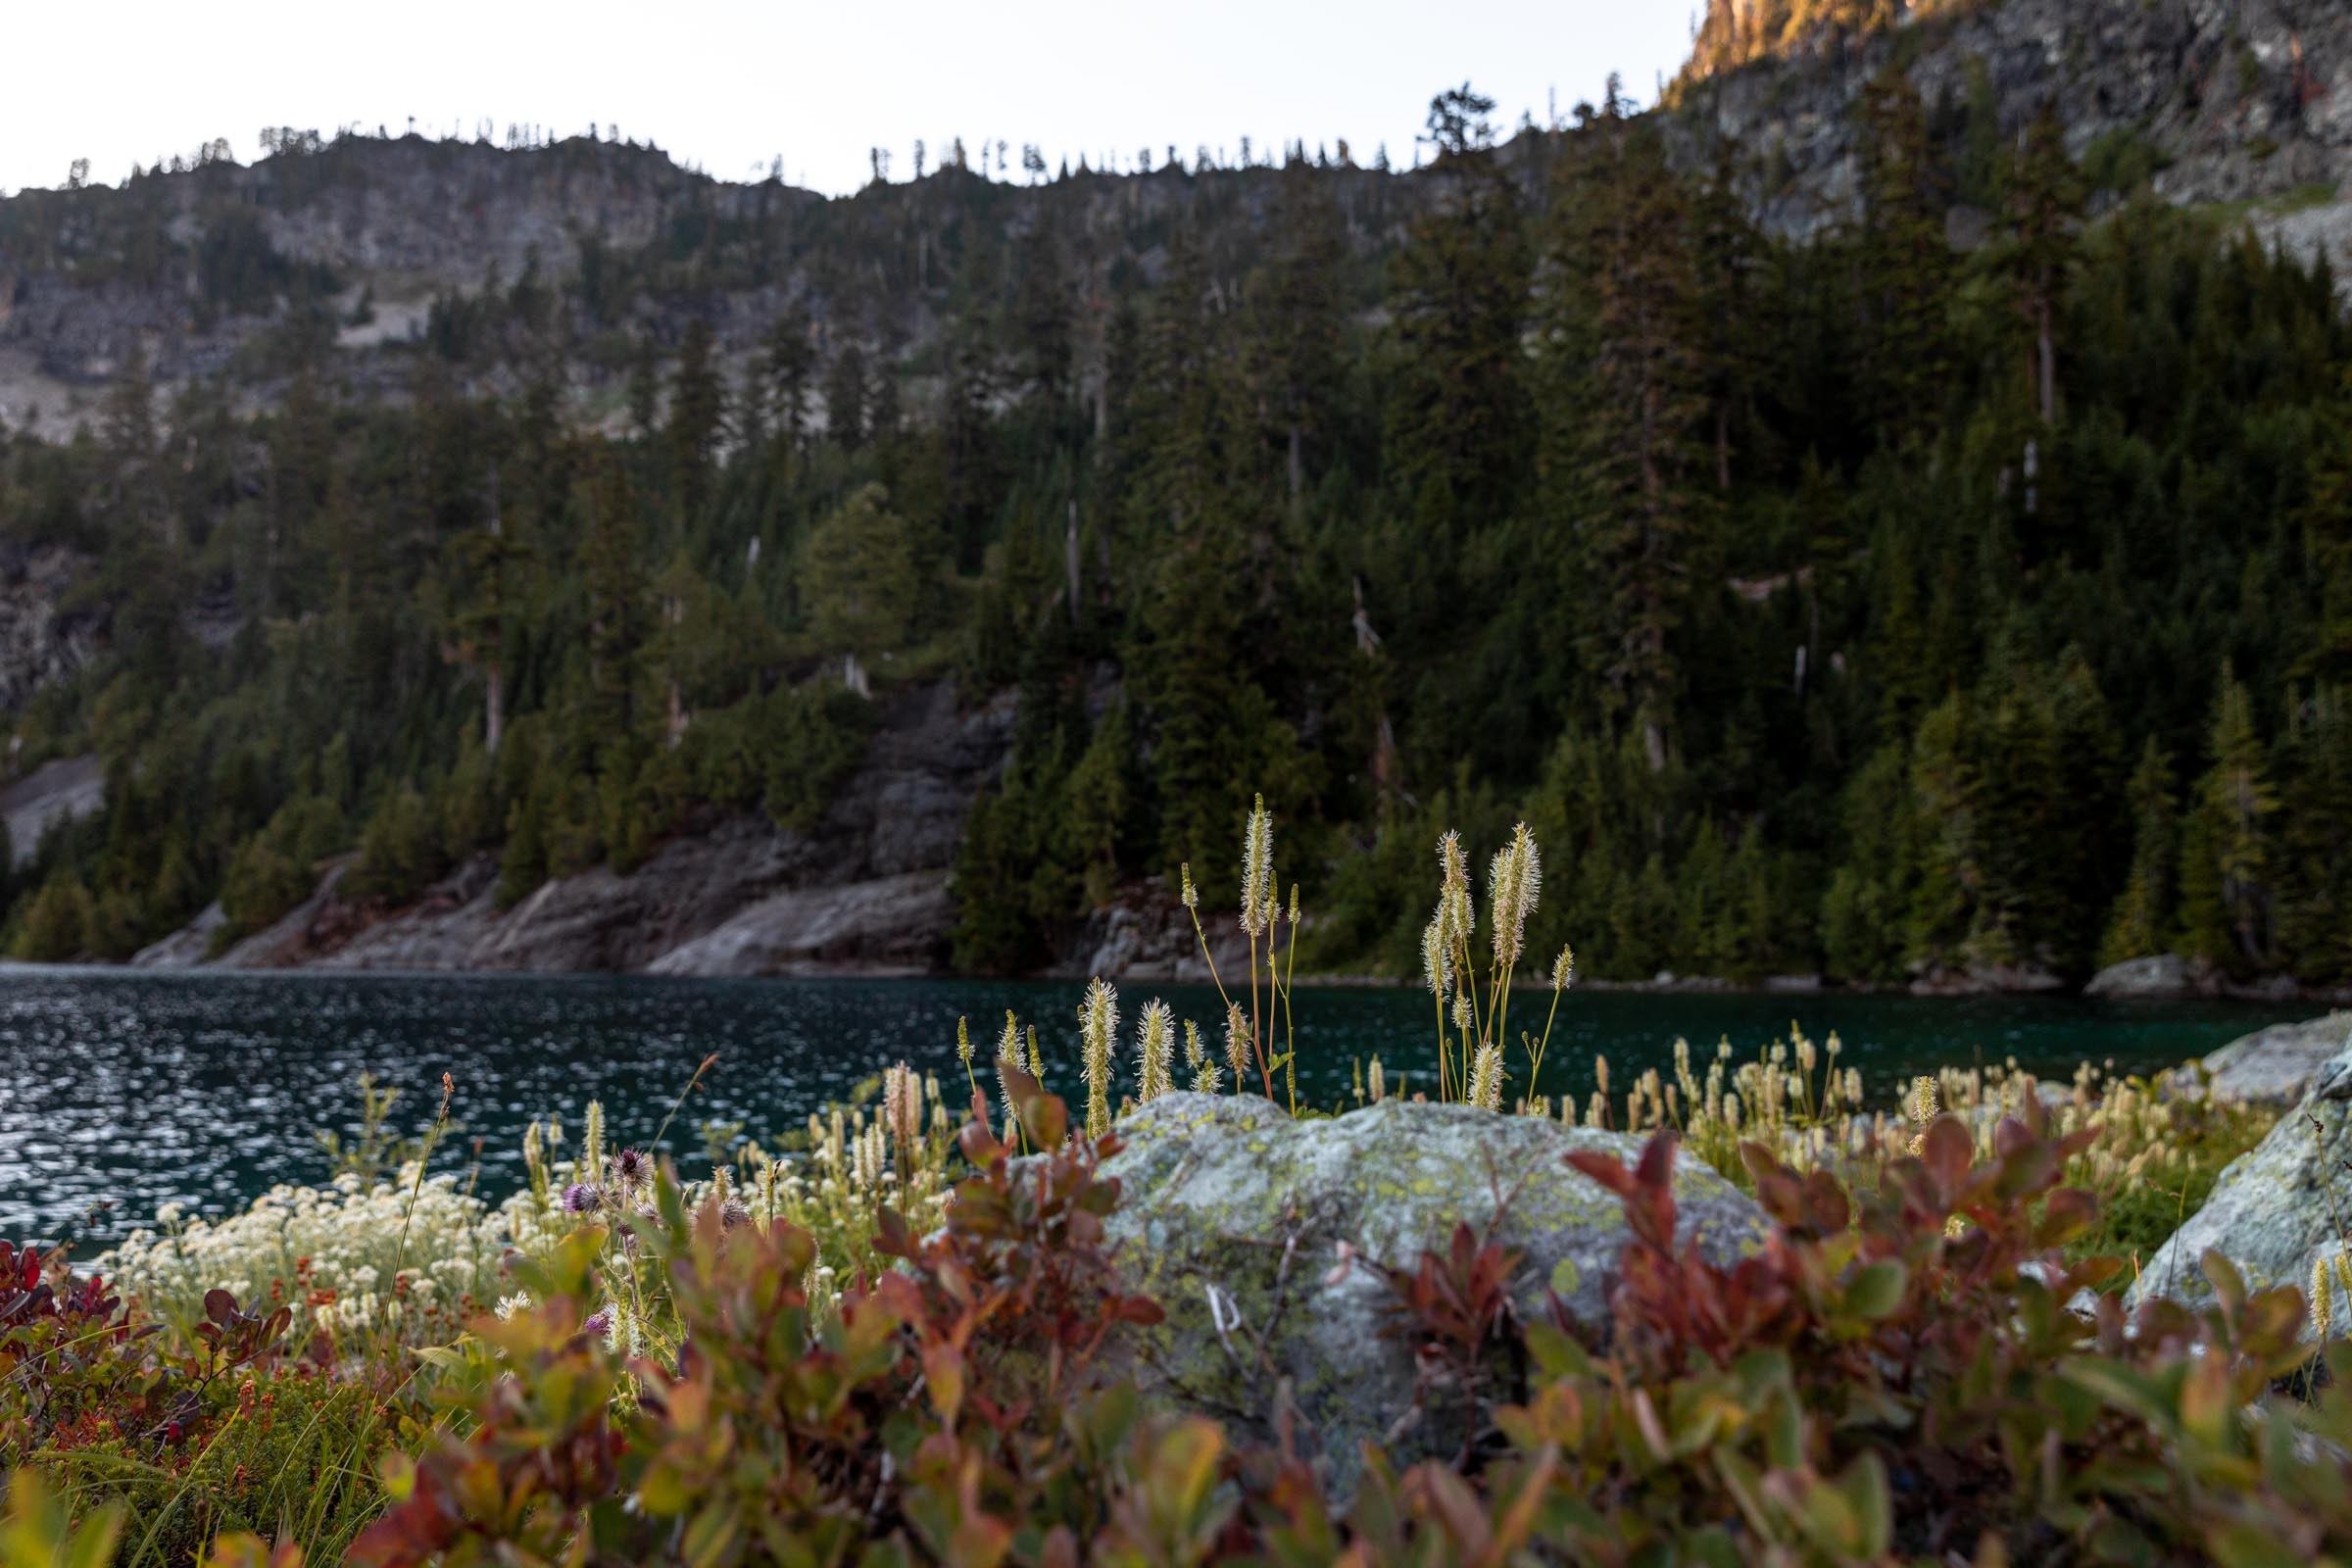
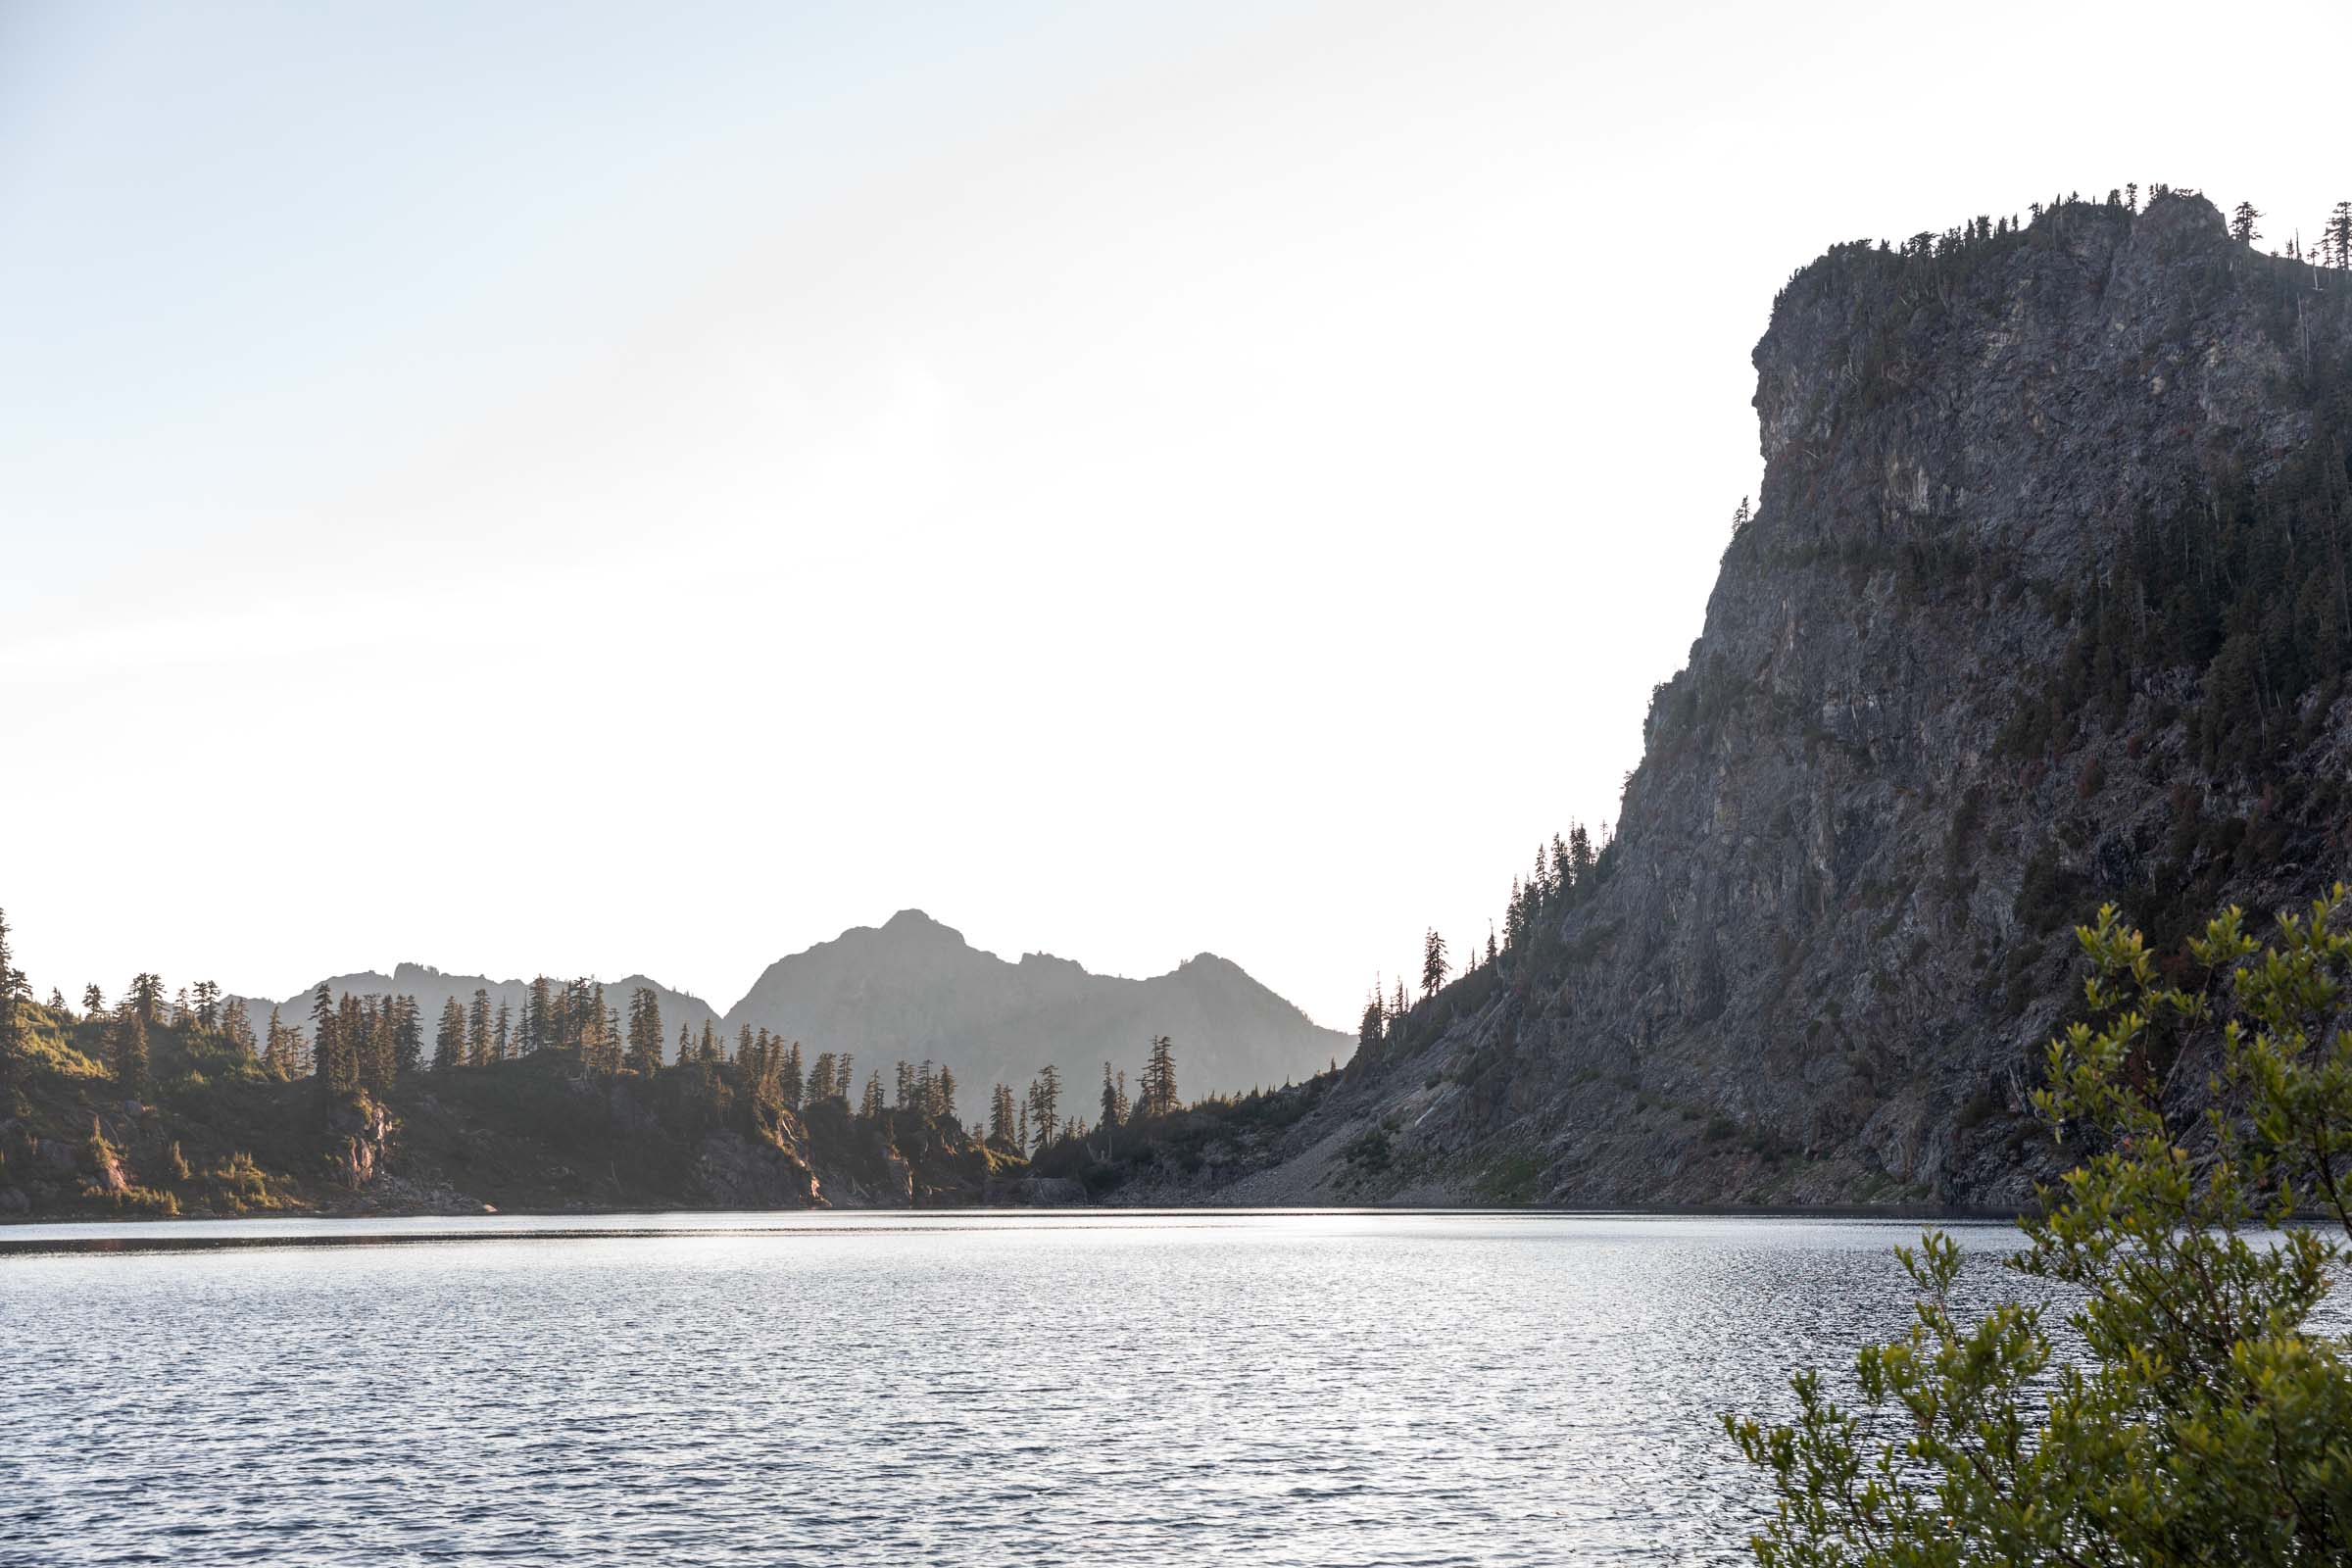

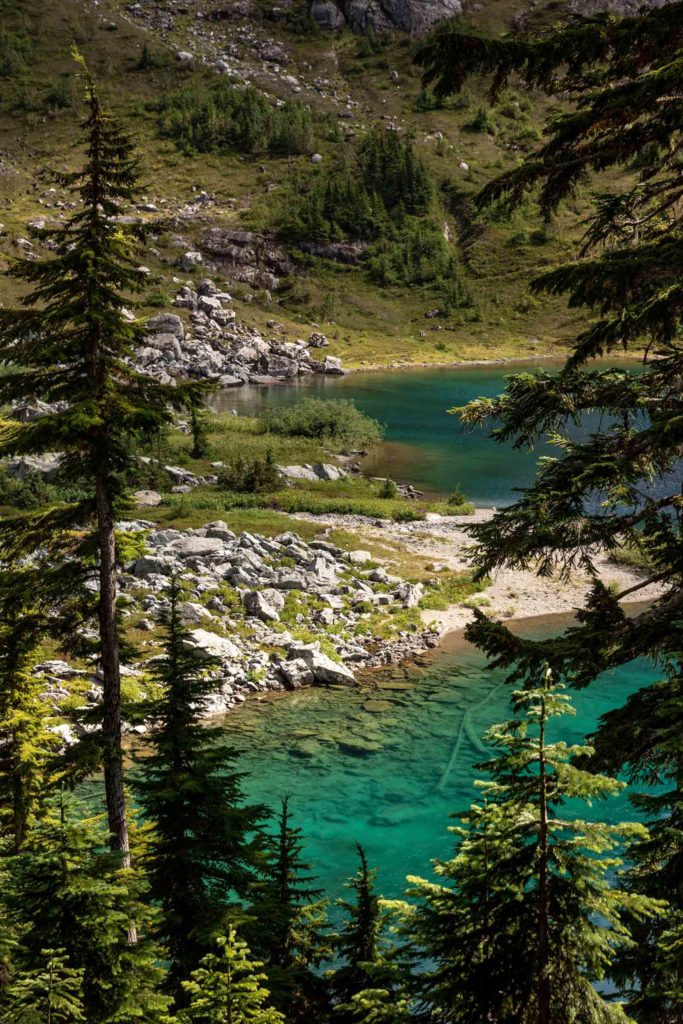
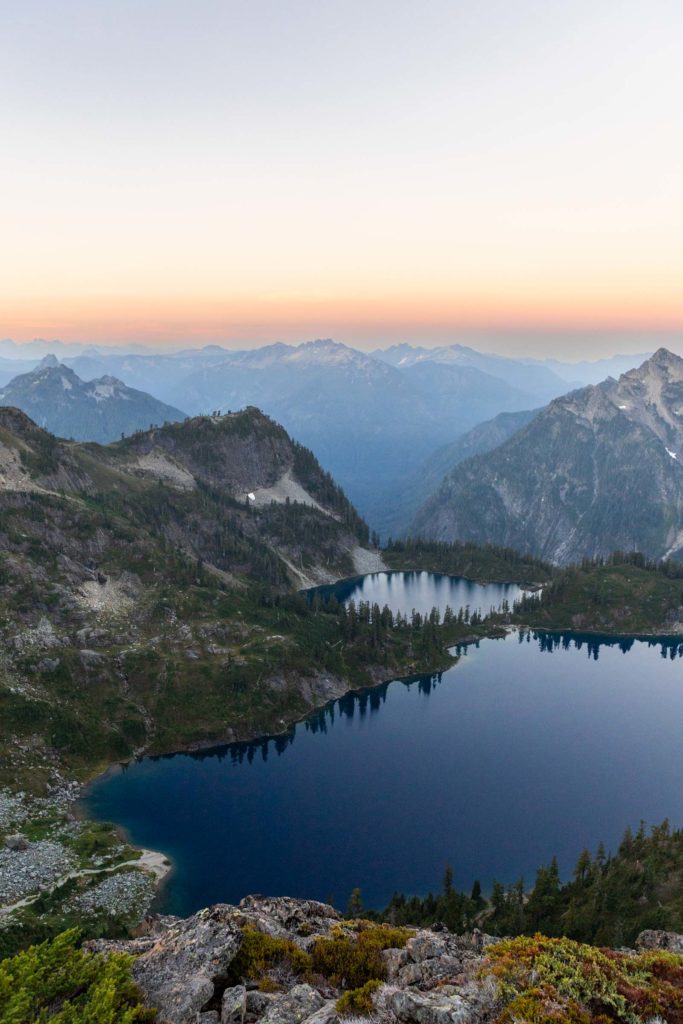
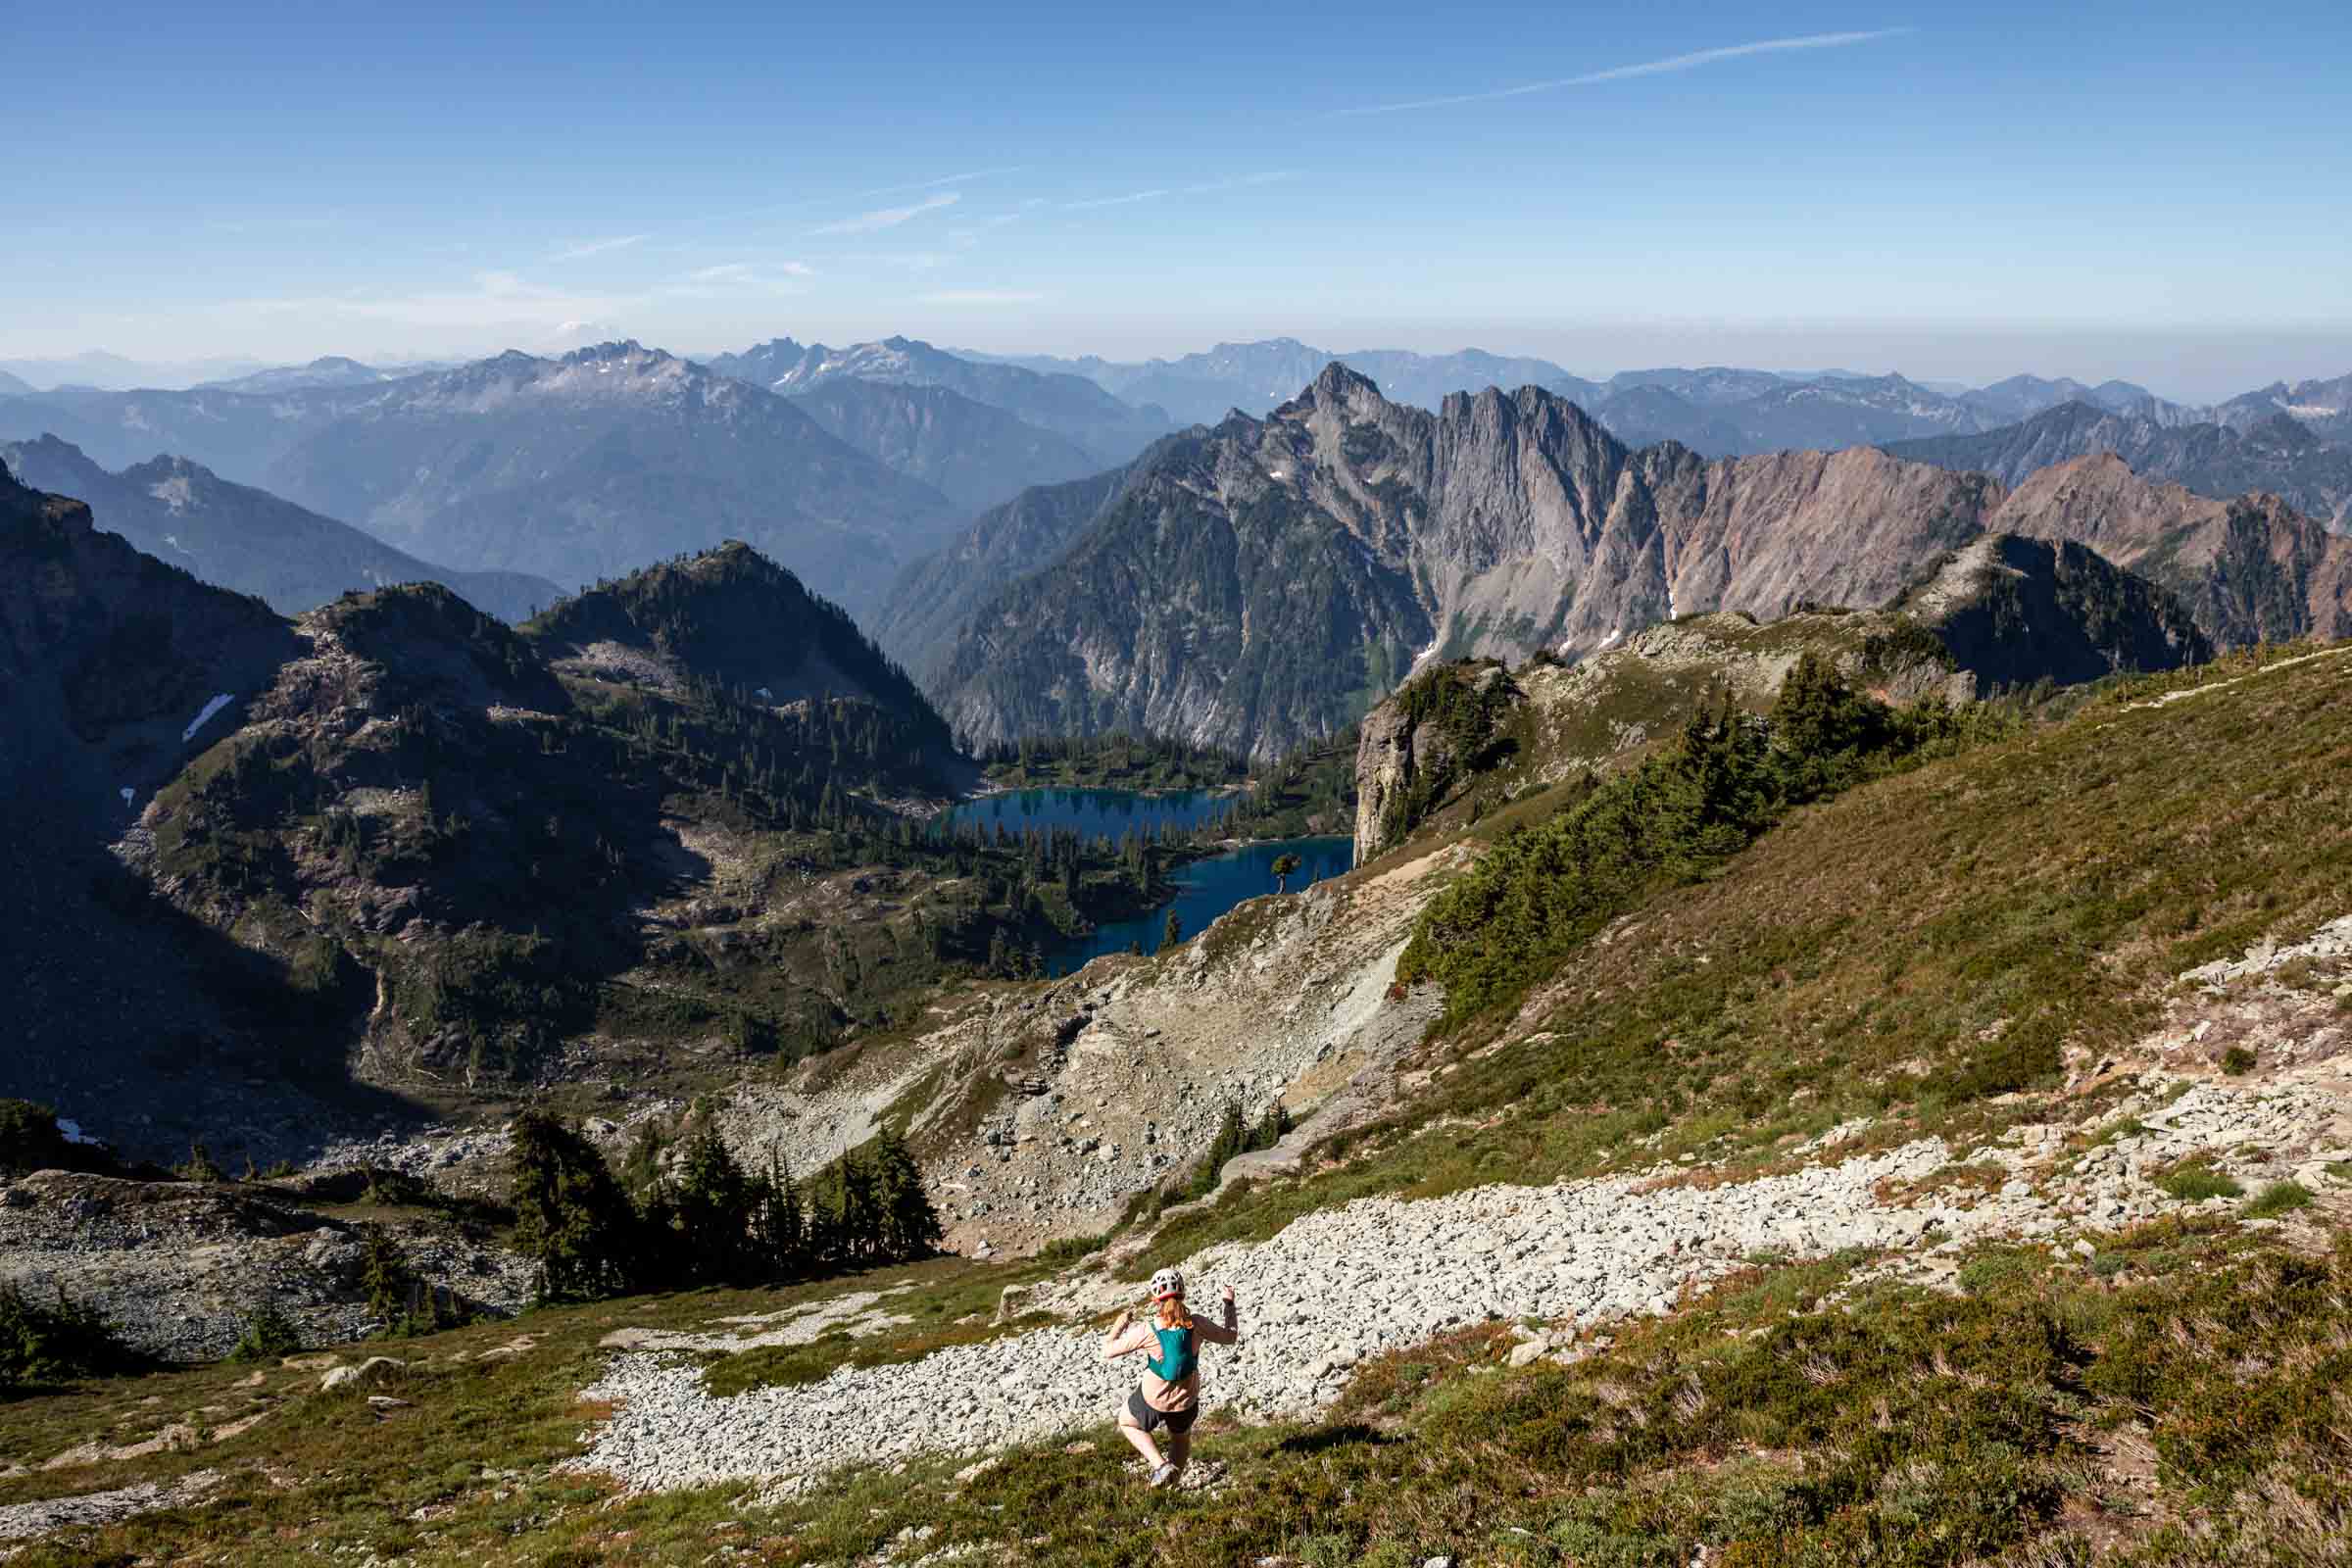
Back on the trail towards Twin Lakes, we enjoyed the undulating ridge to slowly gain more elevation and views of the central cascades before we had to drop back down to Twin Lakes. I had some friends visit the lakes in the last year or so, which put Columbia back higher on my list again and it didn’t disappoint! There’s several campsites near the lake, but camping here does mean adding 600 ft of gain to the summit.
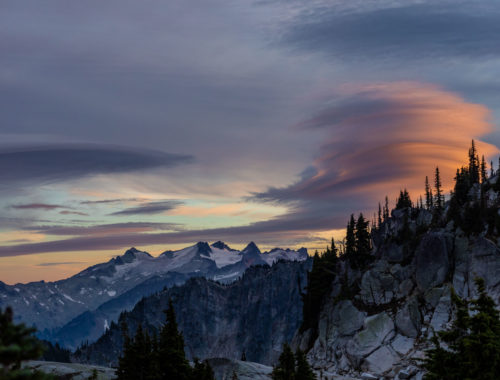
We took a leisurely time at the lake and the sun set far quicker around the ridge than I thought it would. And it was a pleasant cool down as we ate dinner and enjoyed the sunset from our tents. We were on a schedule for an early wake up to hopefully watch the sunrise near the summit or on the way! Naively, we assumed we could go 1000 ft/hr in the low light, but it took a bit longer with the navigation. I forgot to save a map of previous tracks so we were relying on written beta for directions to help guide us through. It felt more adventurous!
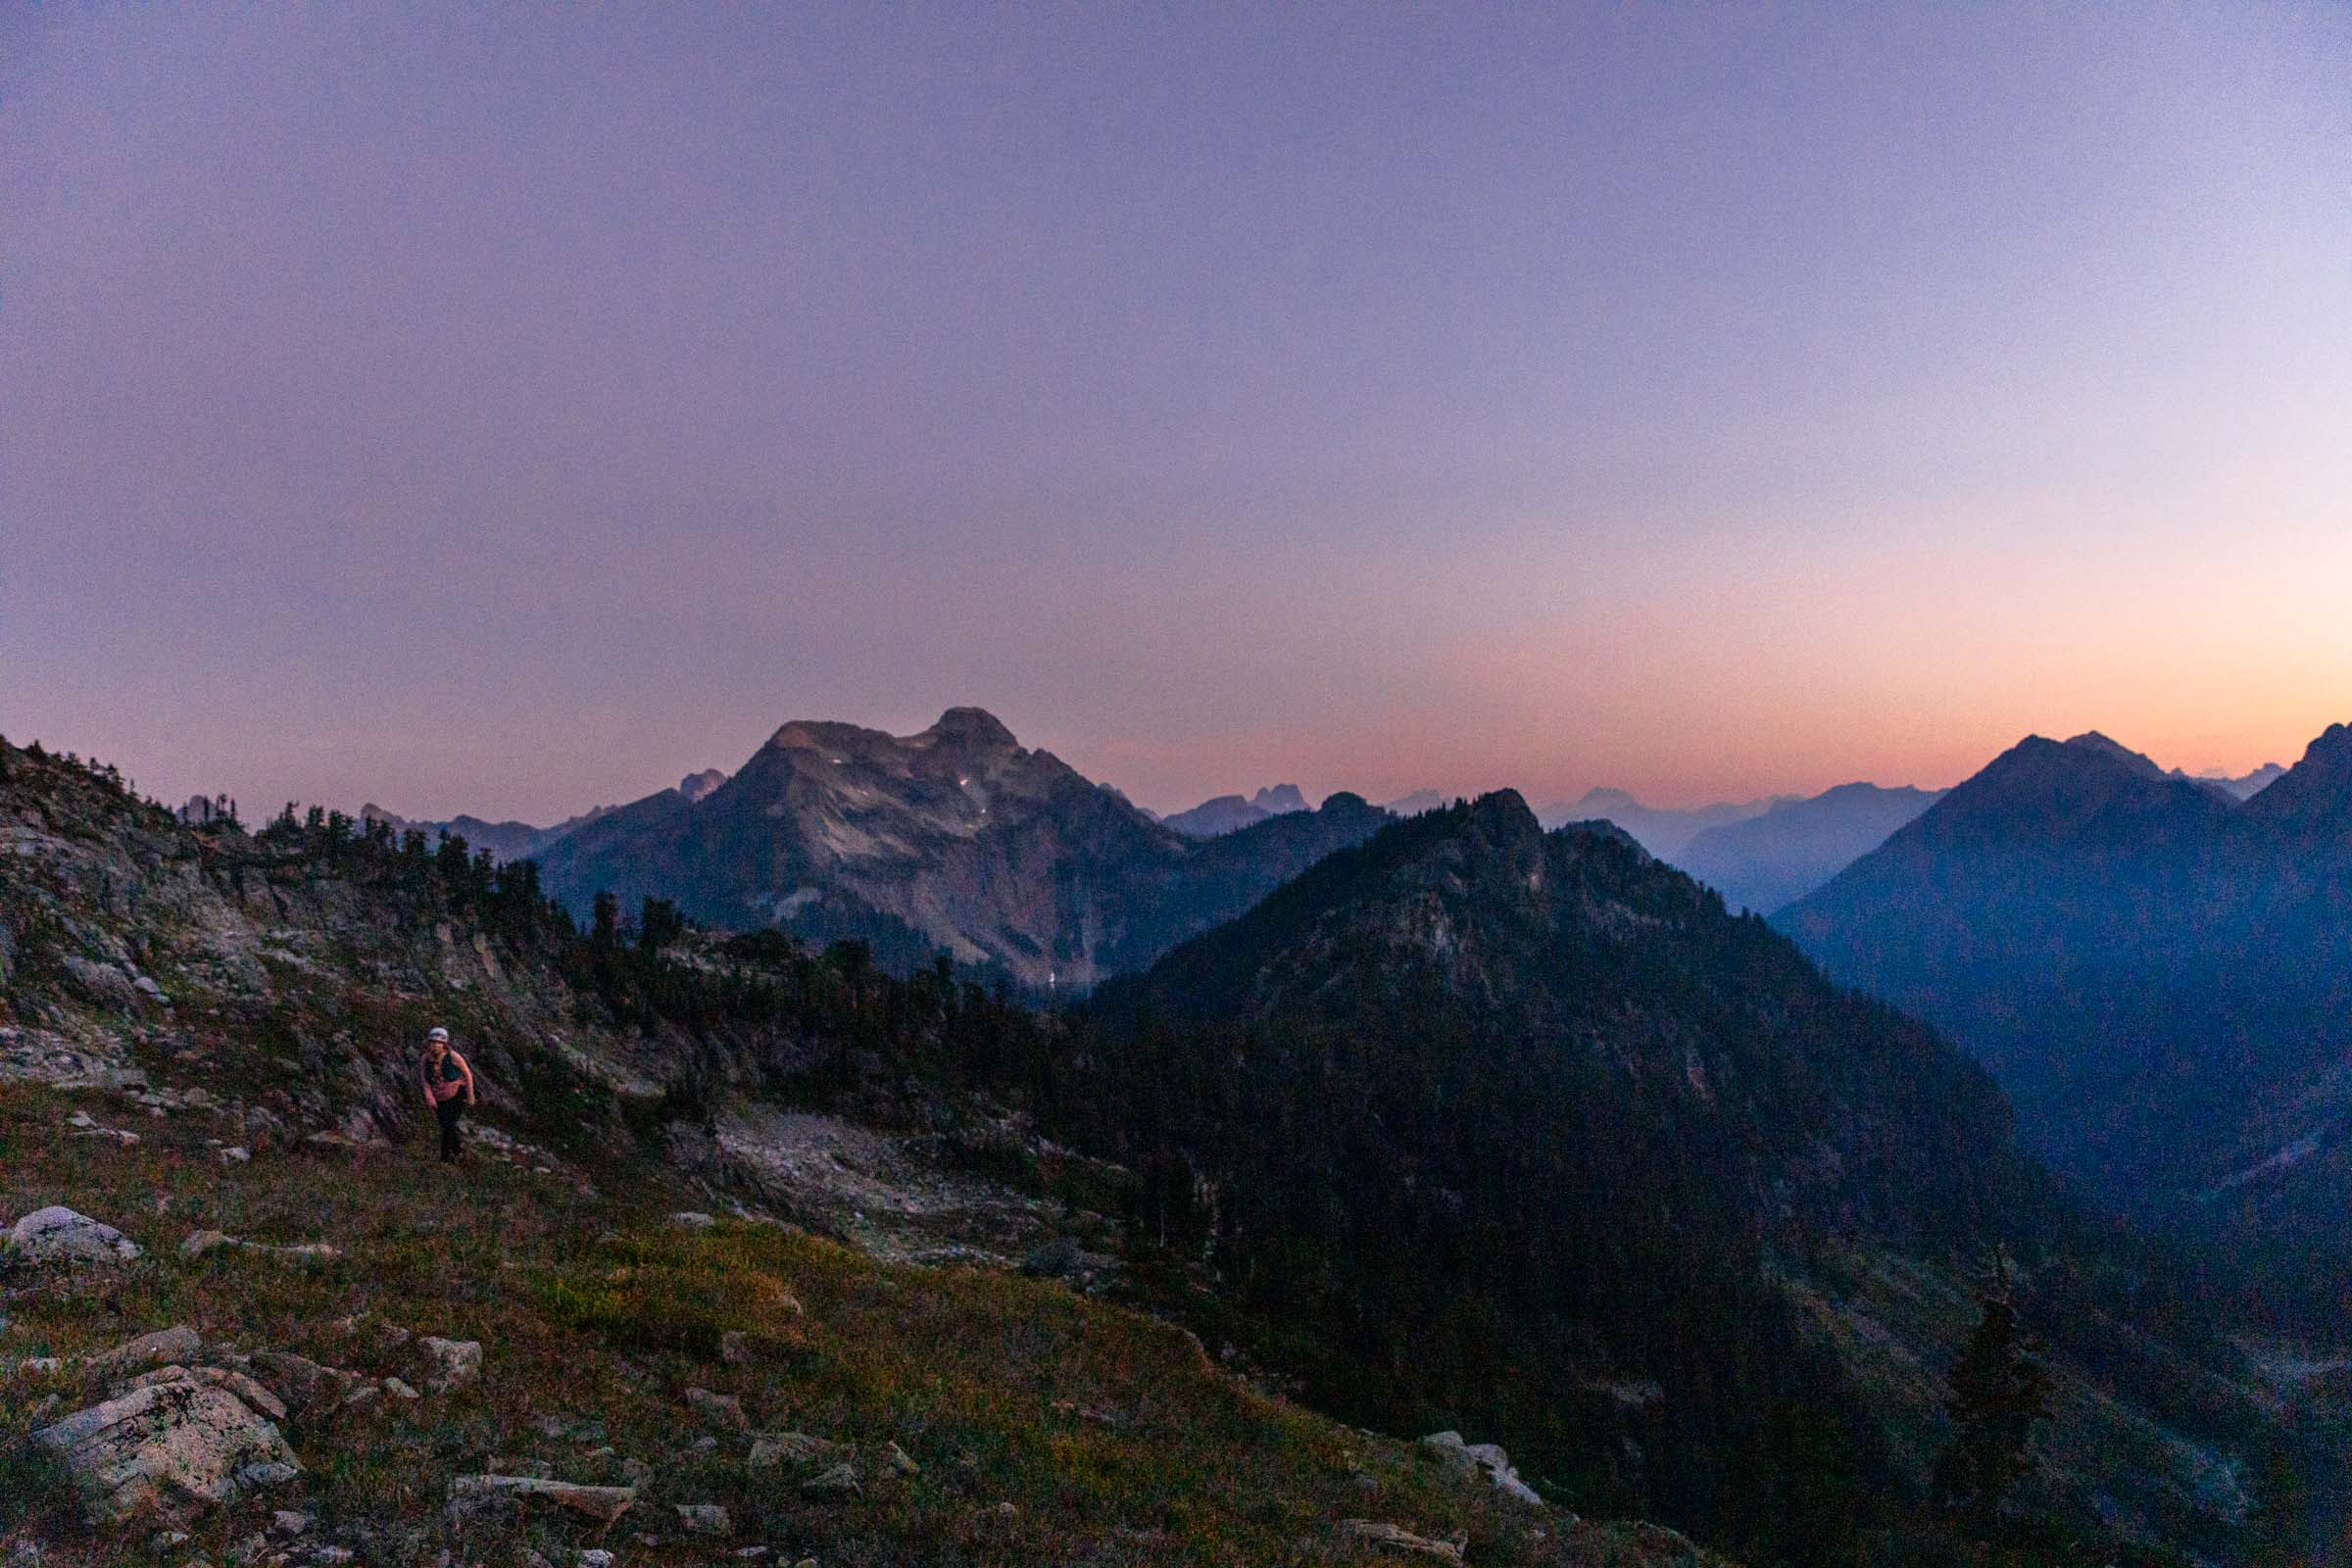
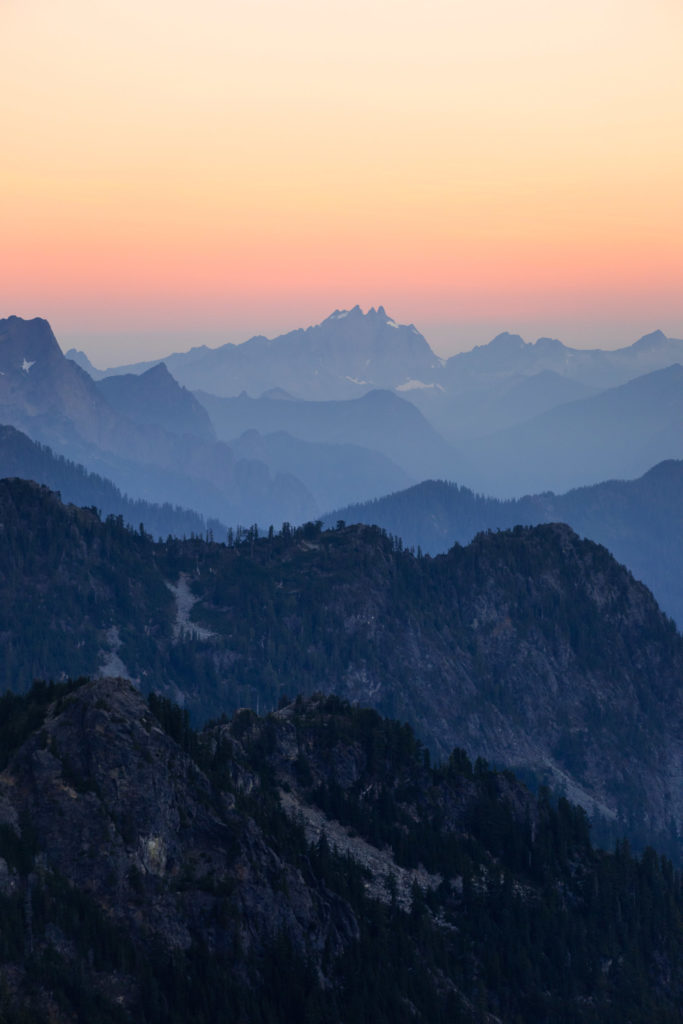

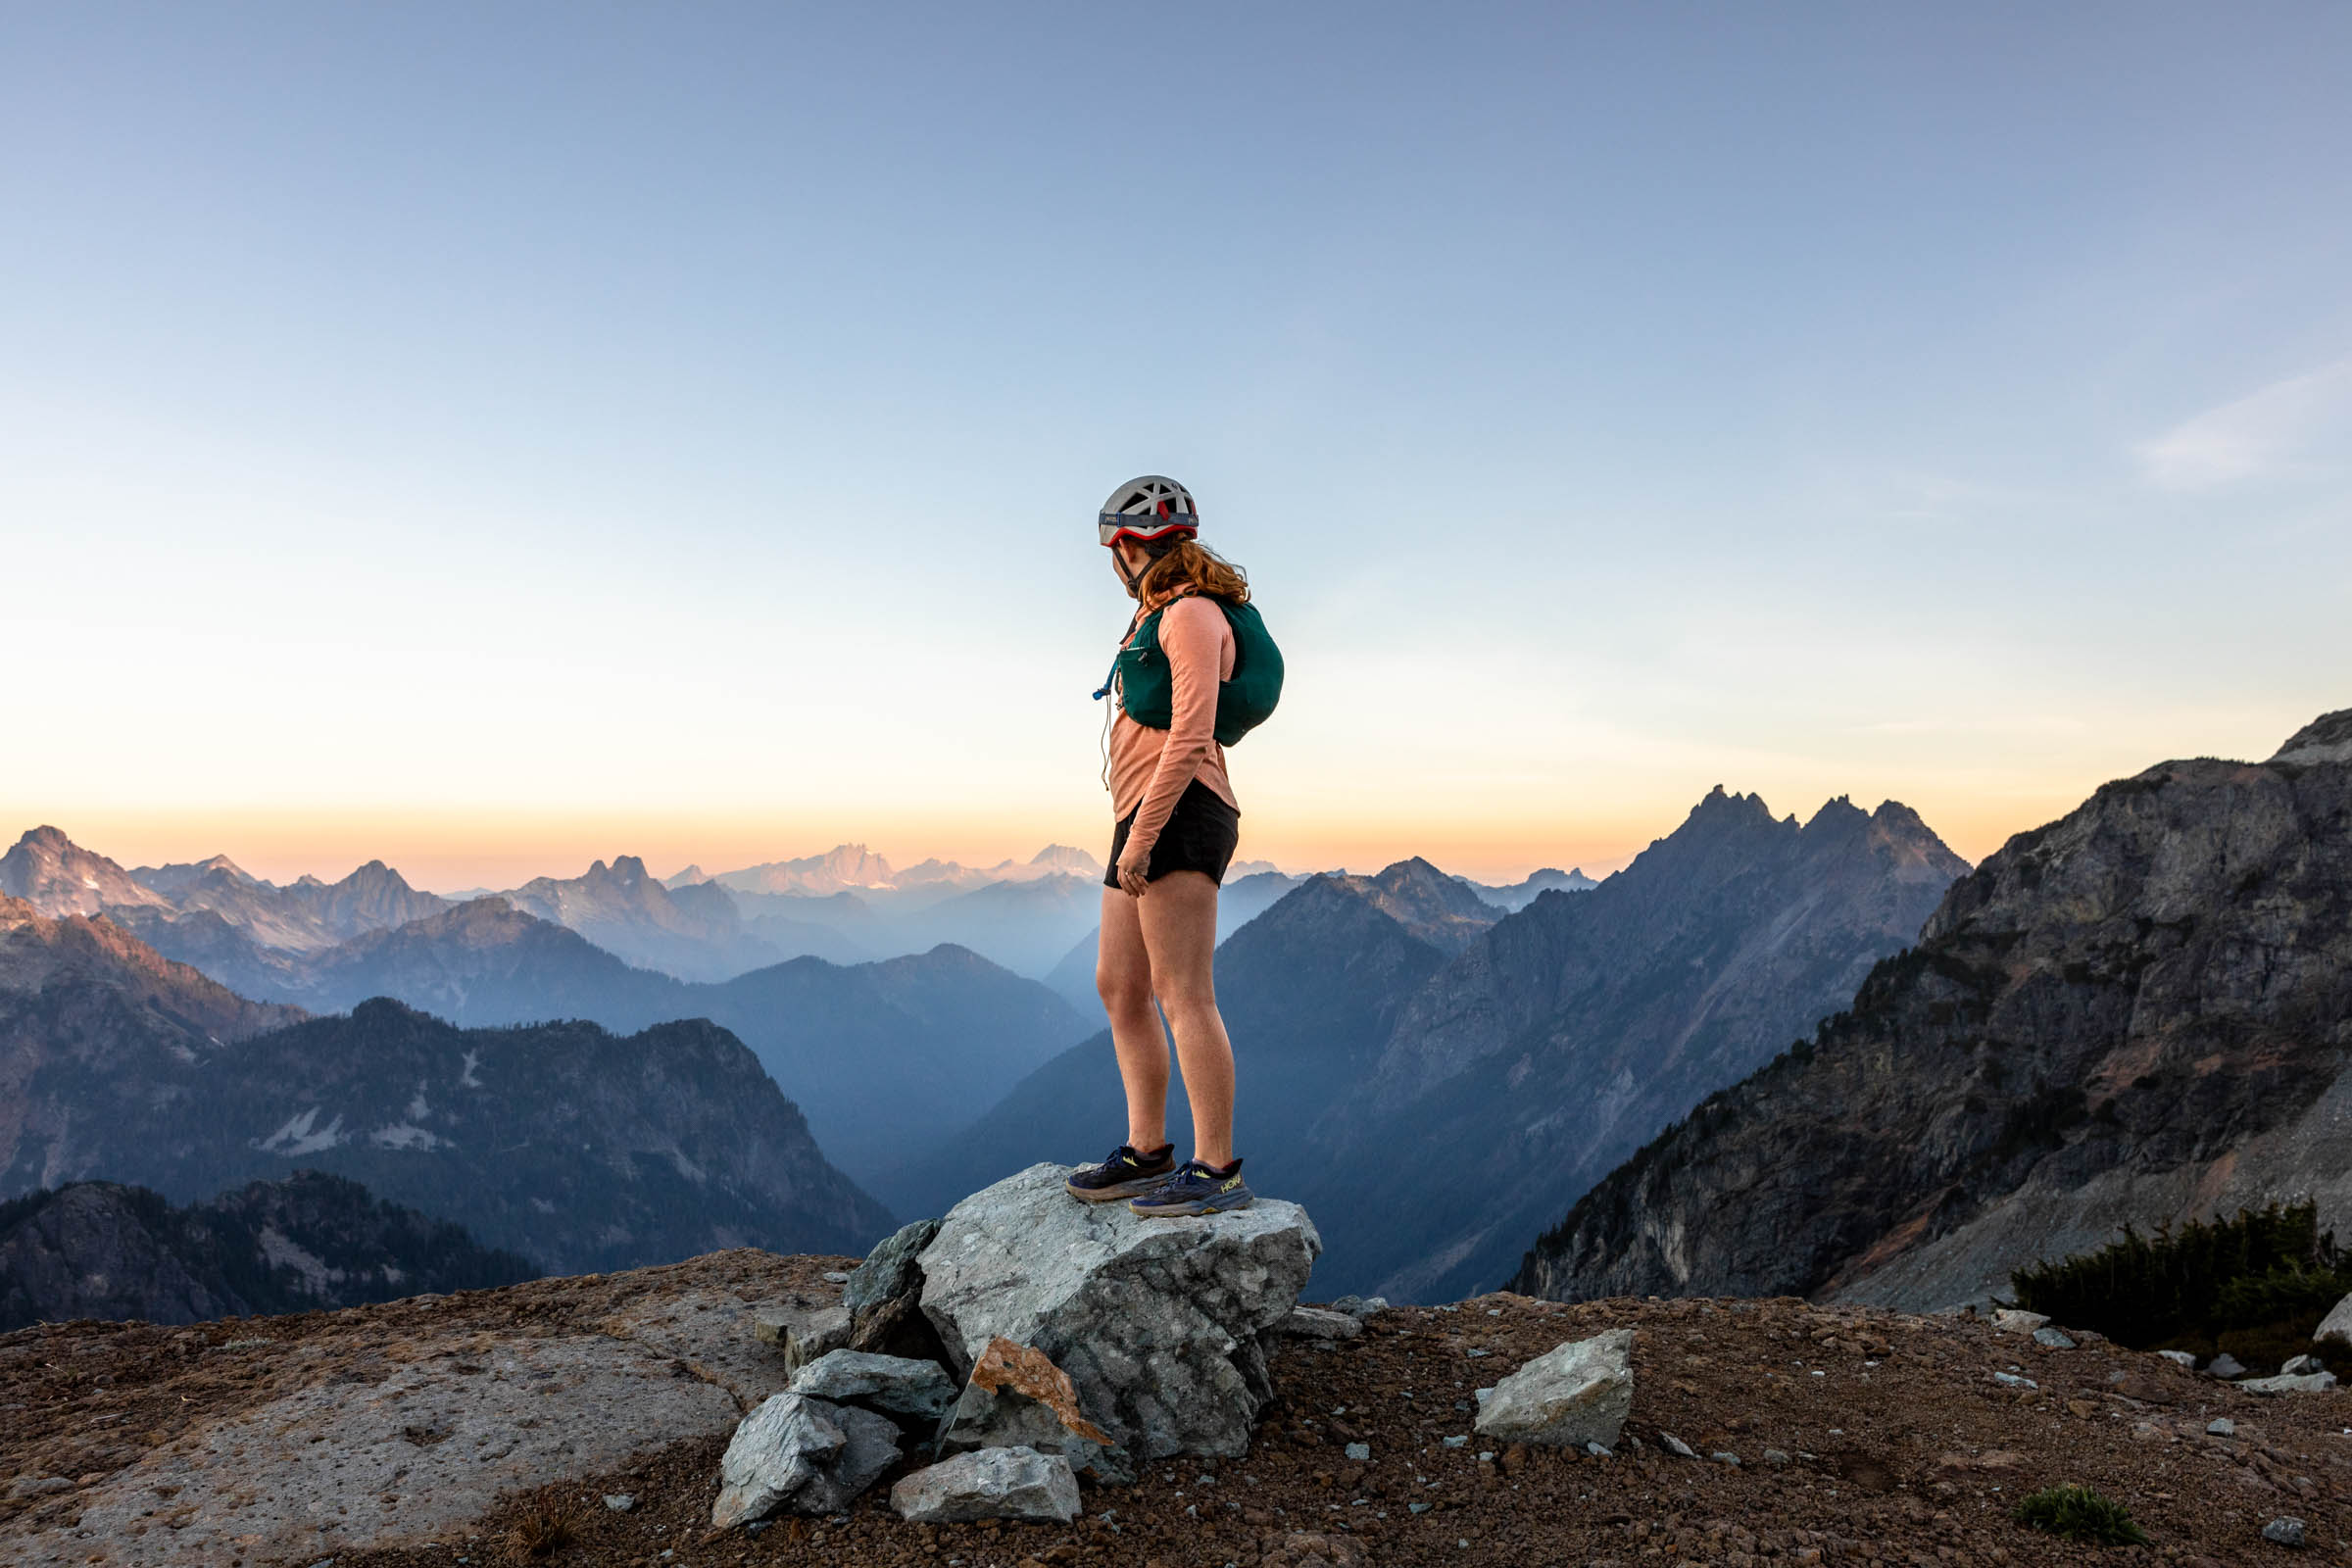
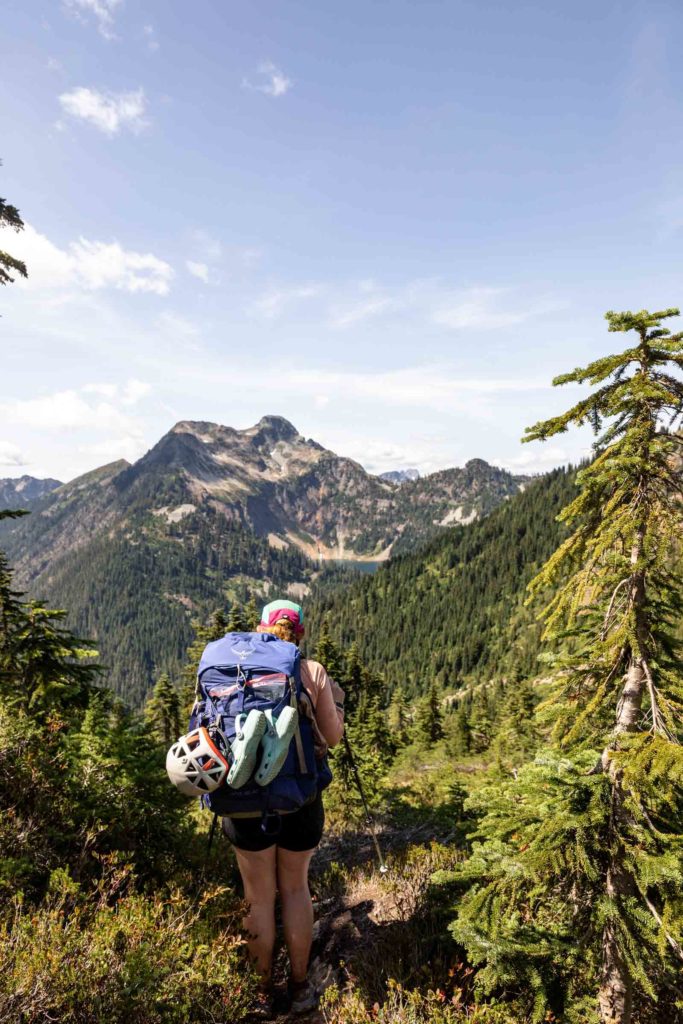
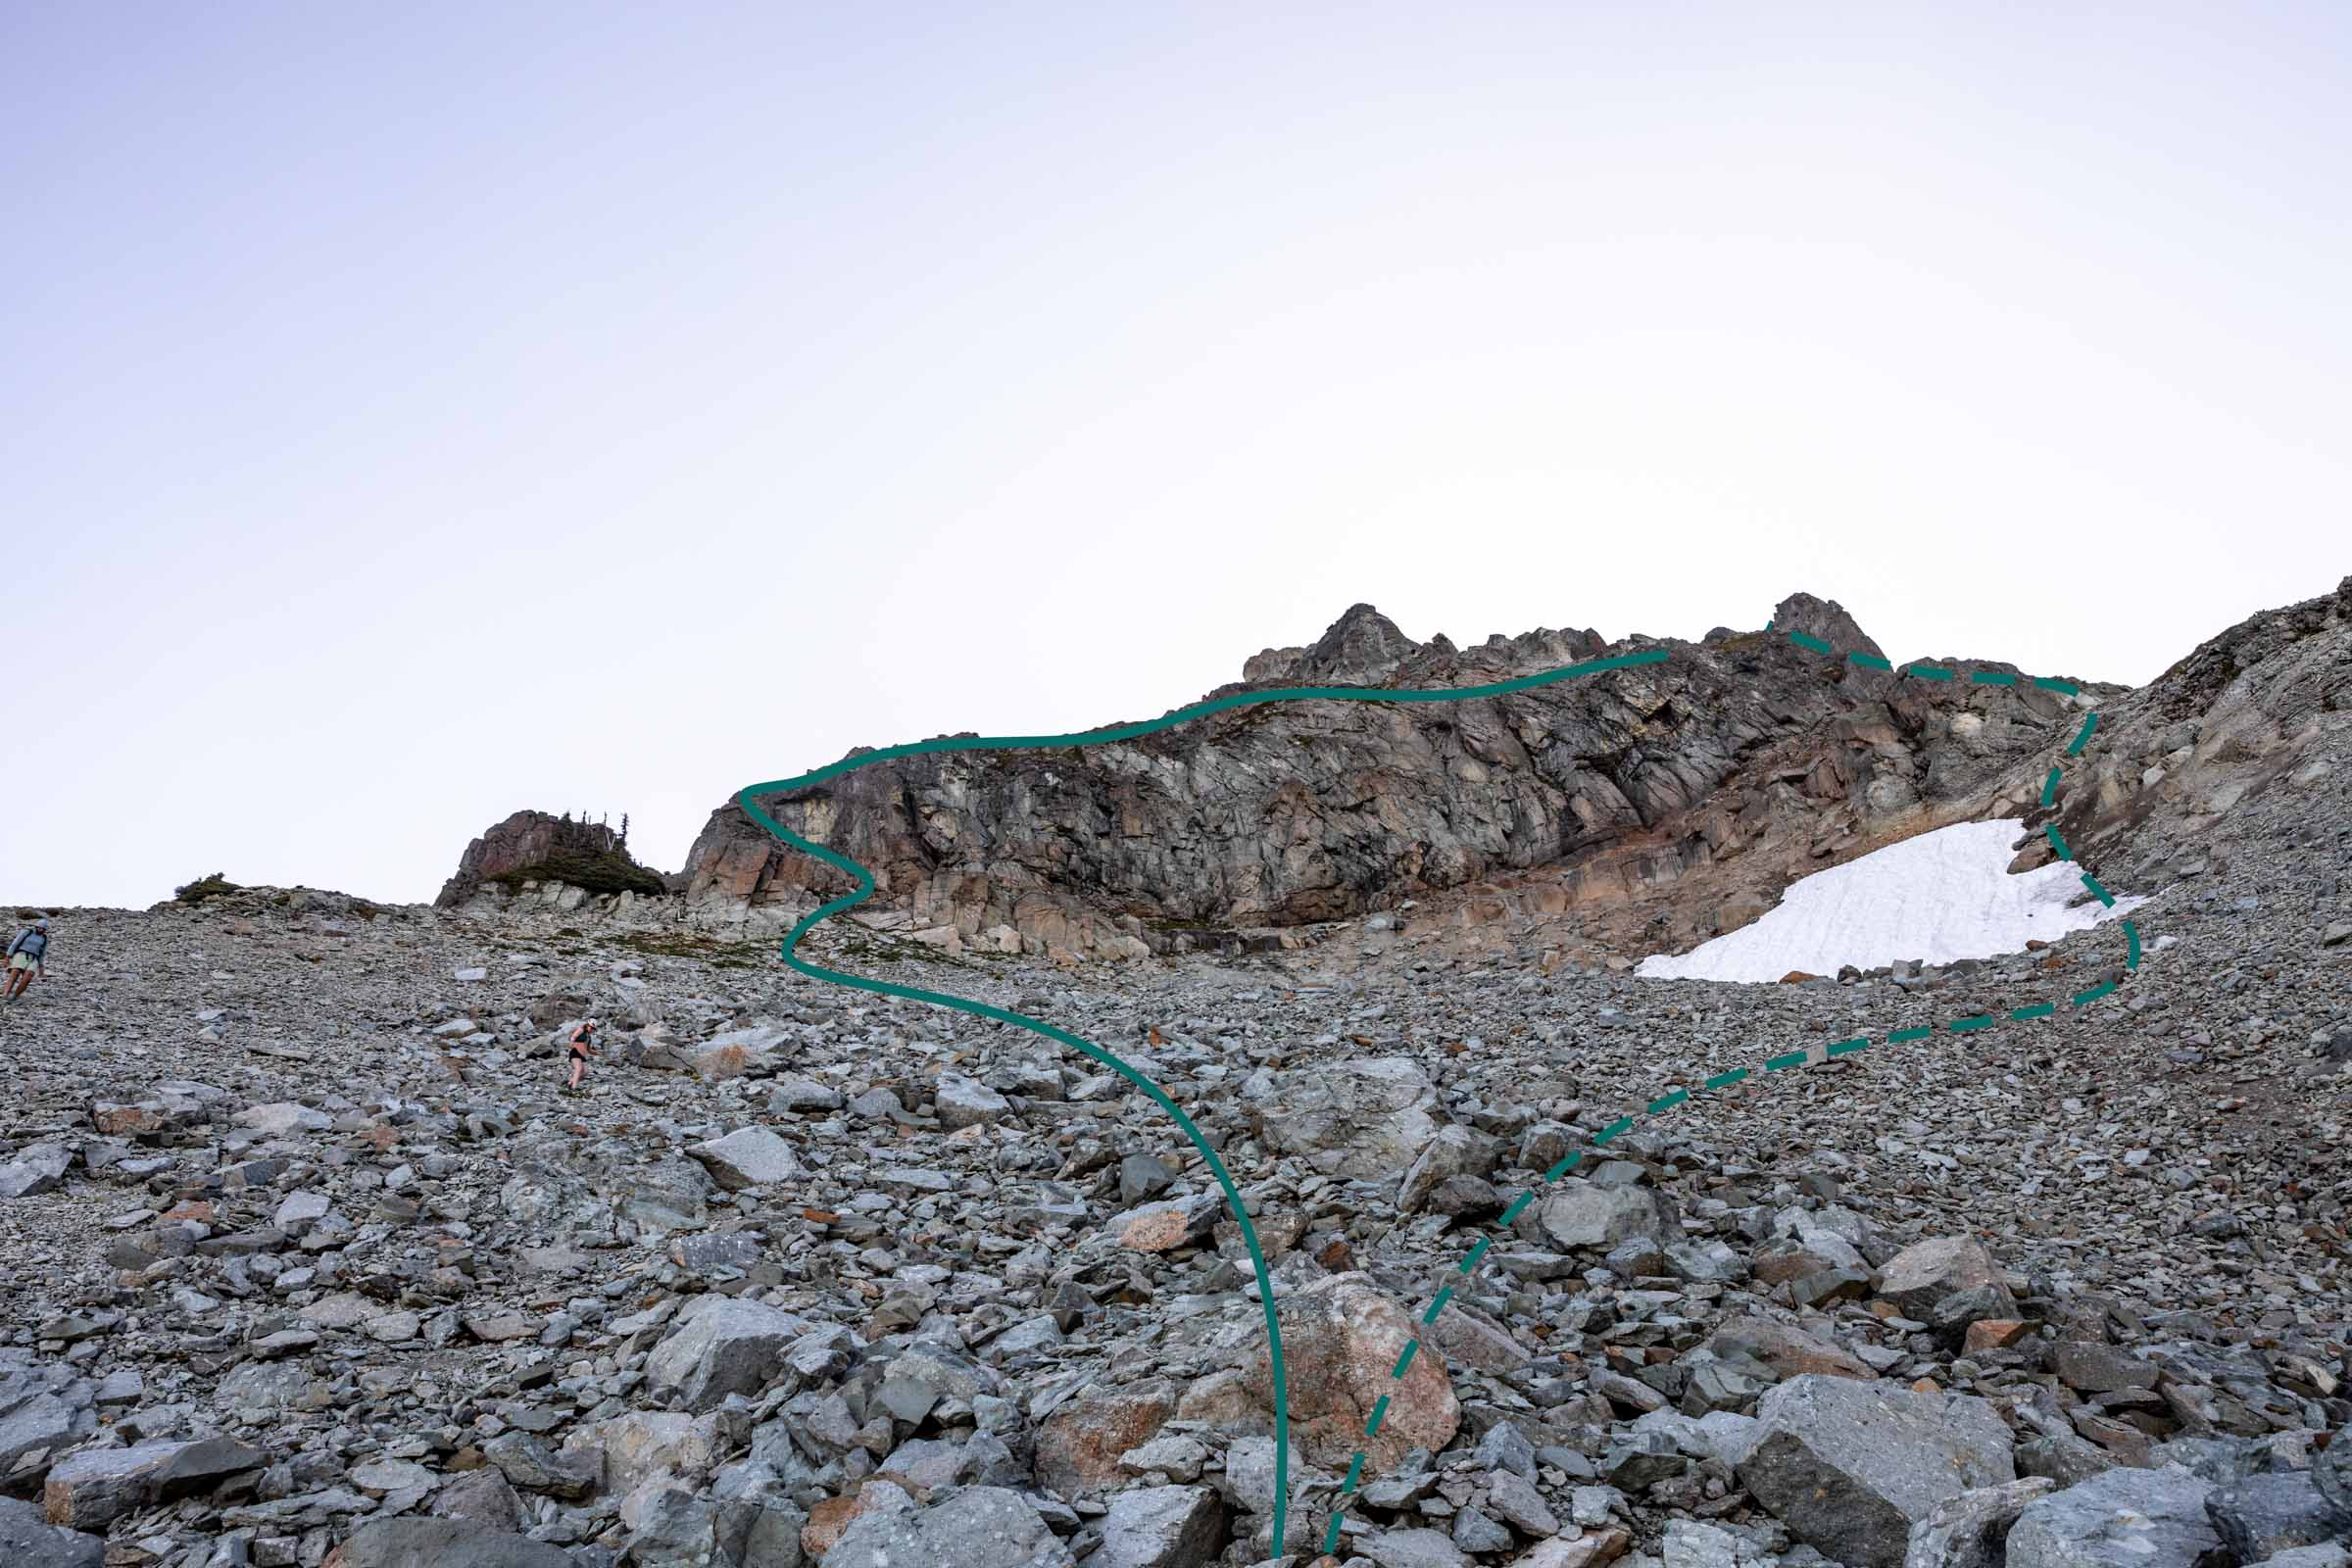
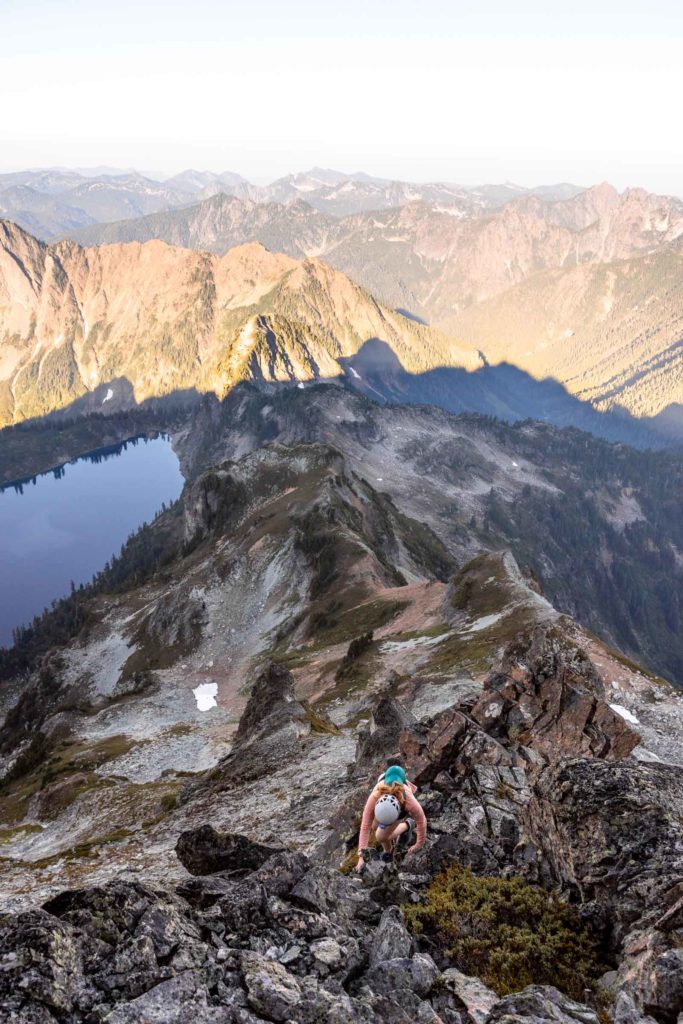
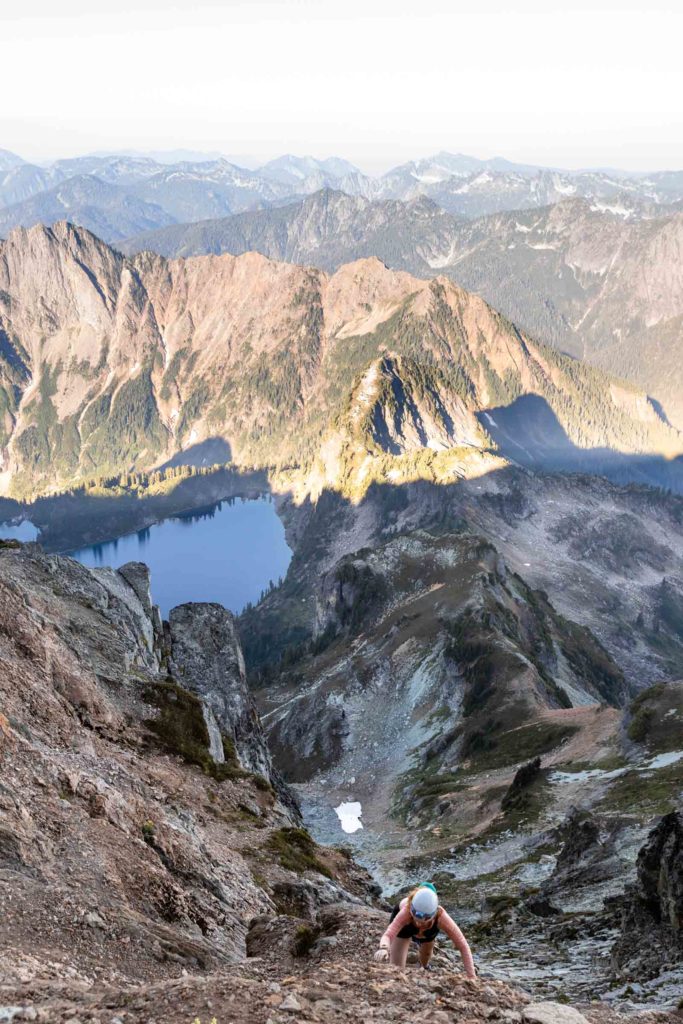
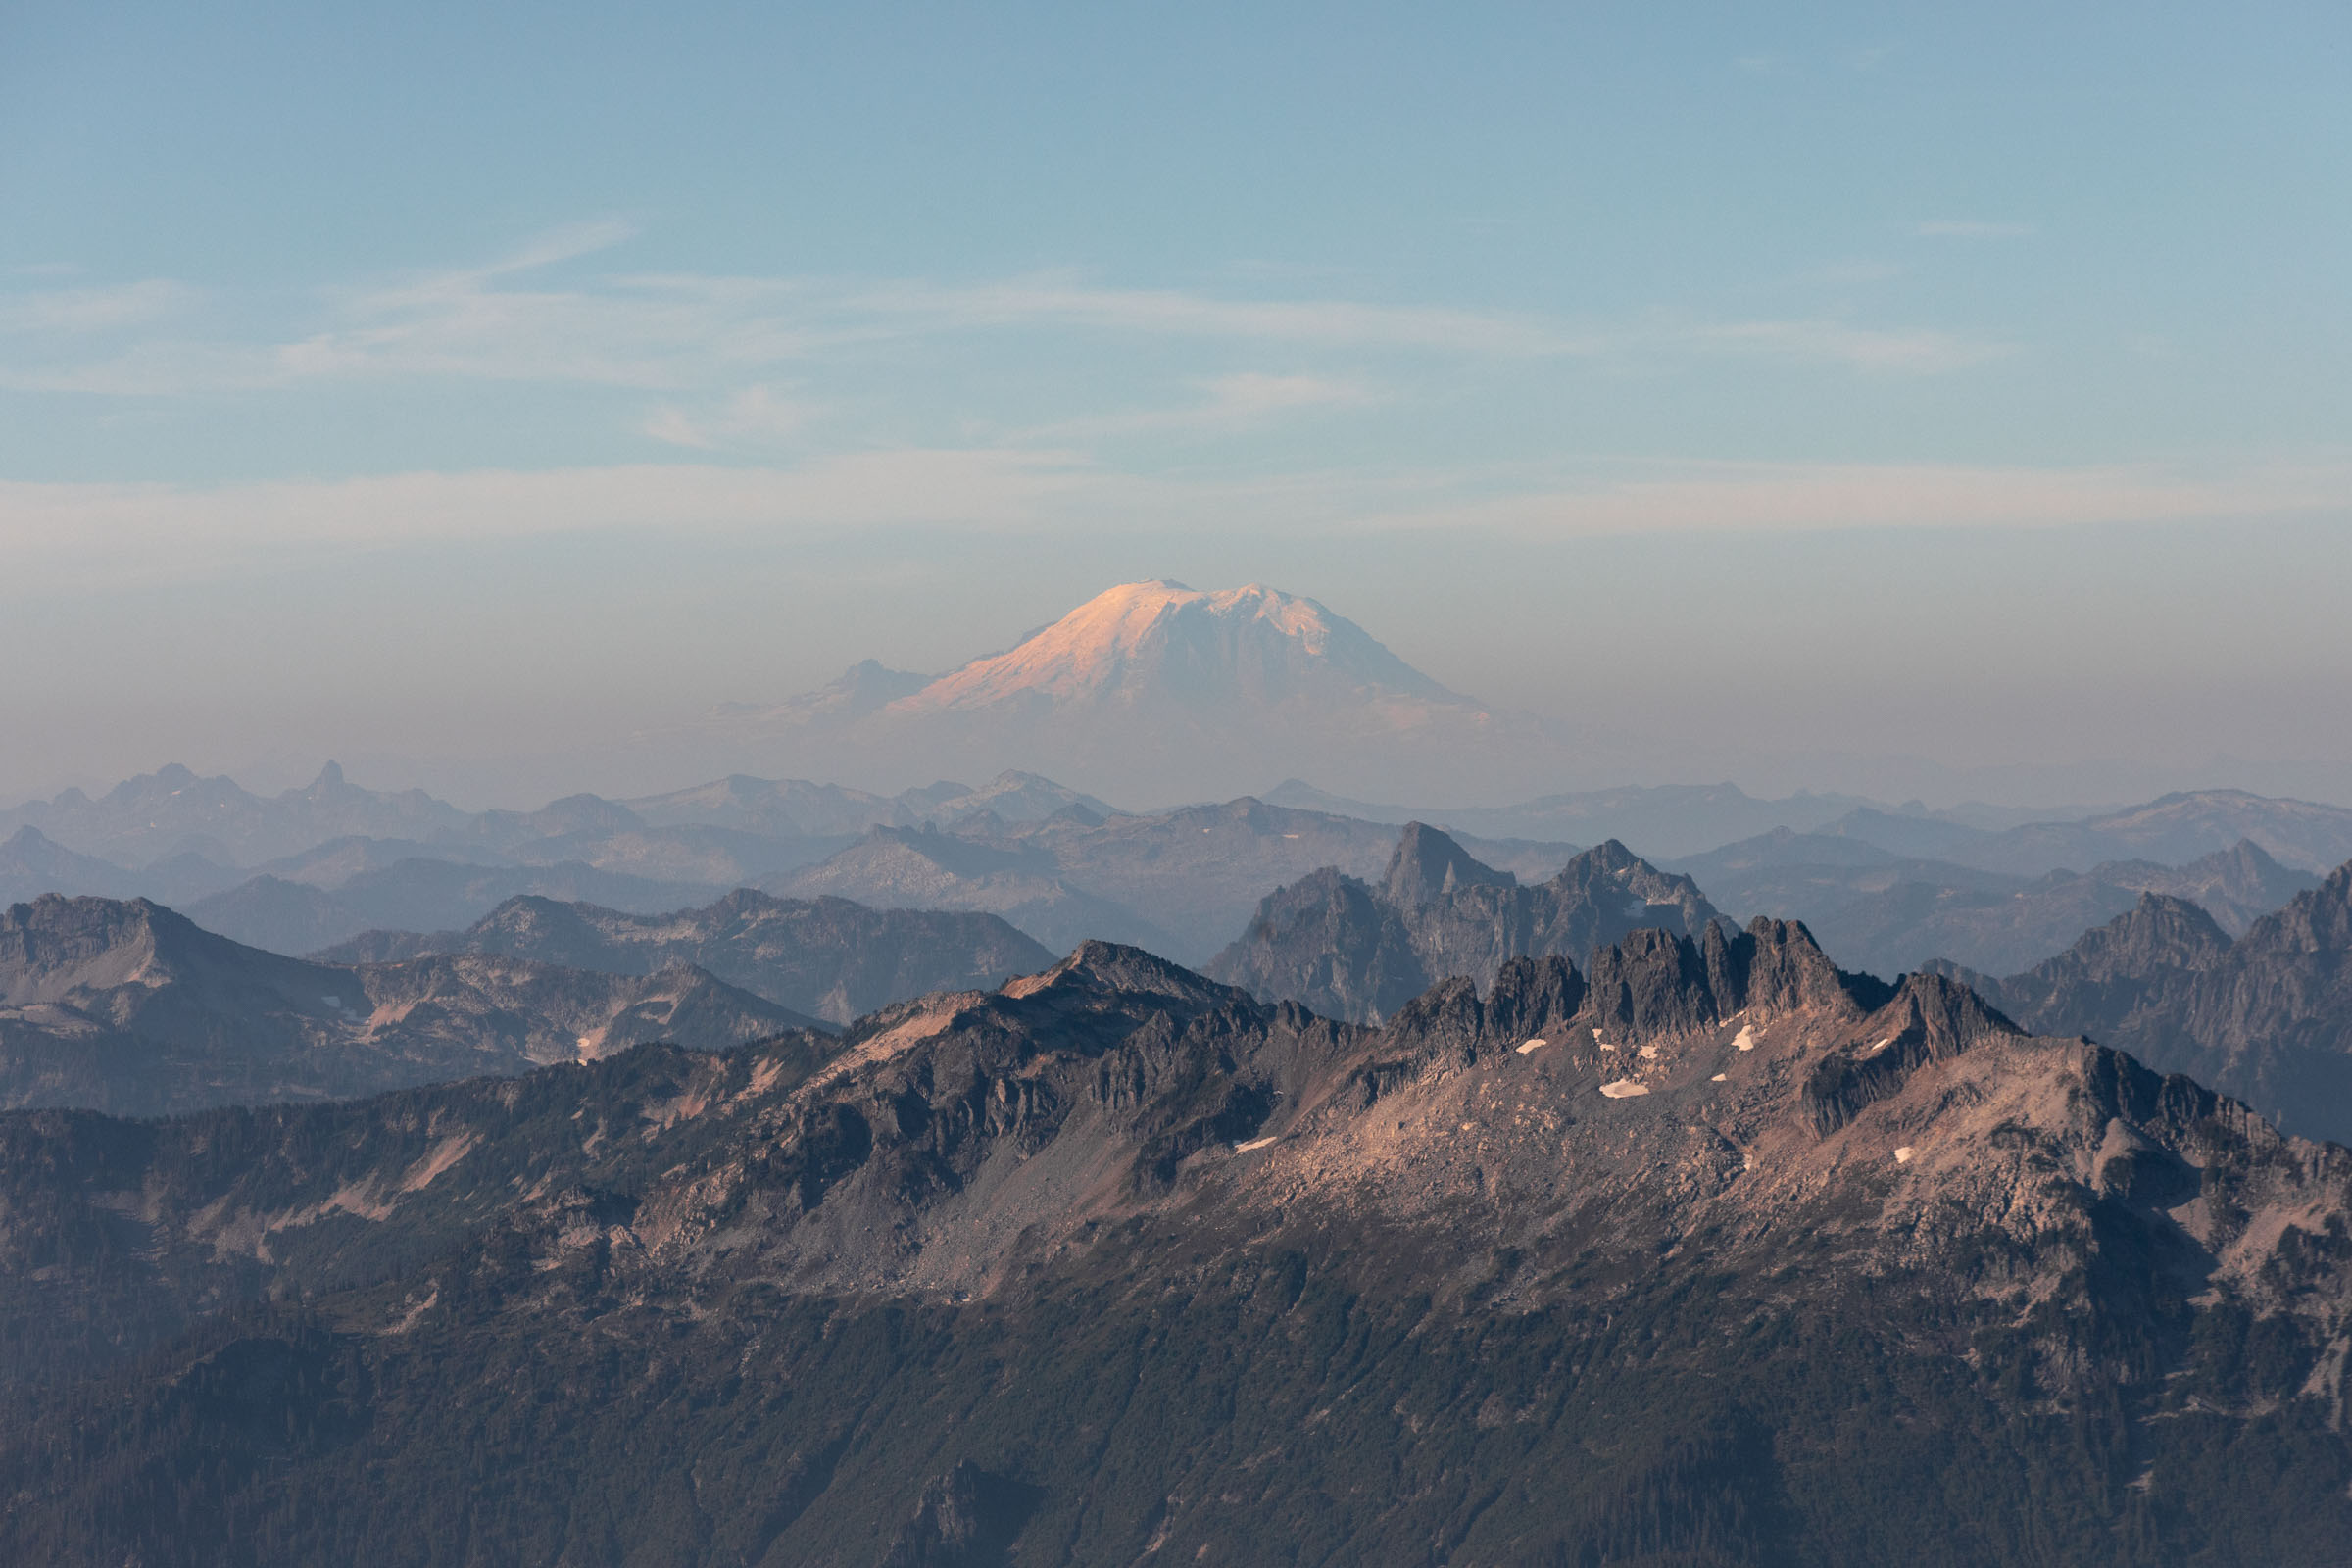
By 4am, we were on our way up back to the ridge. But with dropping off our overnight gear and route finding, we didn’t start the true off trail until 4:45am and sun was going to rise in an hour! I think we backtracked less than a quarter mile from the pass between Twin Peaks. We made our way across the boulder field until we found the heather slopes above and clambered up to where I enjoyed a few extra minutes watching the light hit all the peaks around us. Everything from Mt Daniel to sneaky Rainer to all the Mountain Loop Highway peaks and Mt Baker. From here, we found a trail again – apparently there seems to be one that stays on the ridge instead of going into the boulder field. We easily followed the trail along the ridge until it spit us back on another heathered slope on the south facing side this time. The trail is no longer really there but you can make your way up on what looks like steppes into the hill.
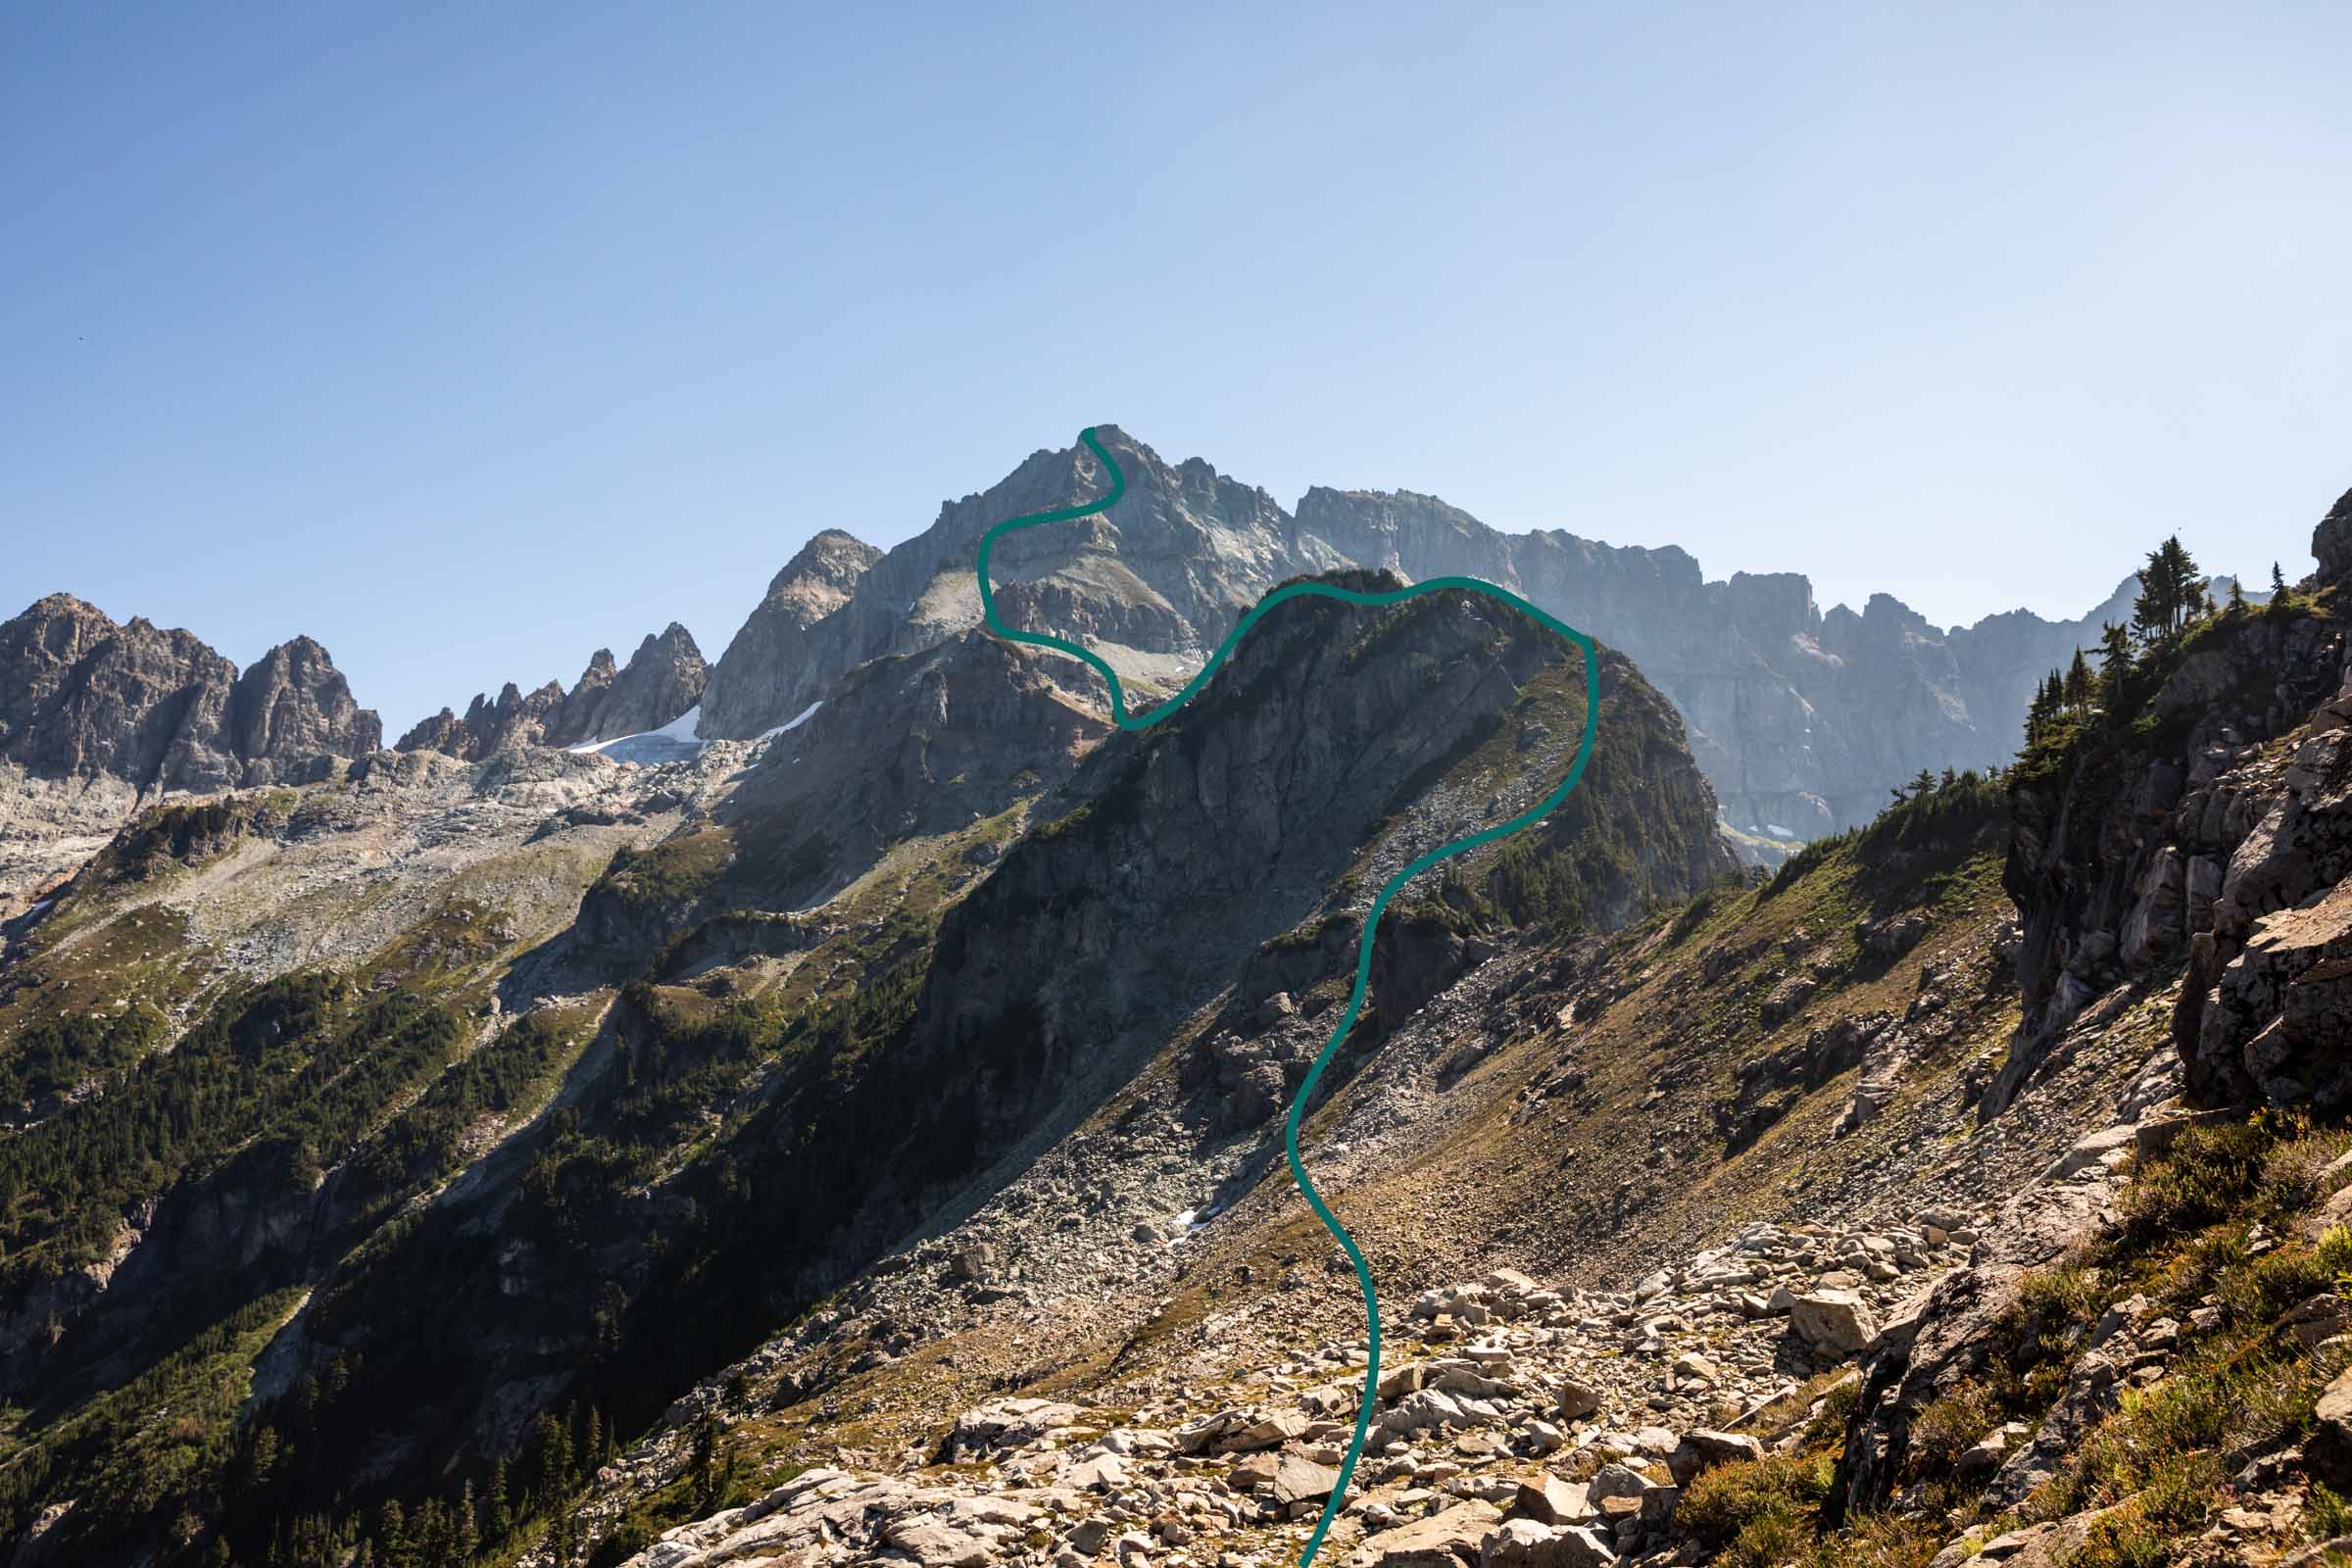
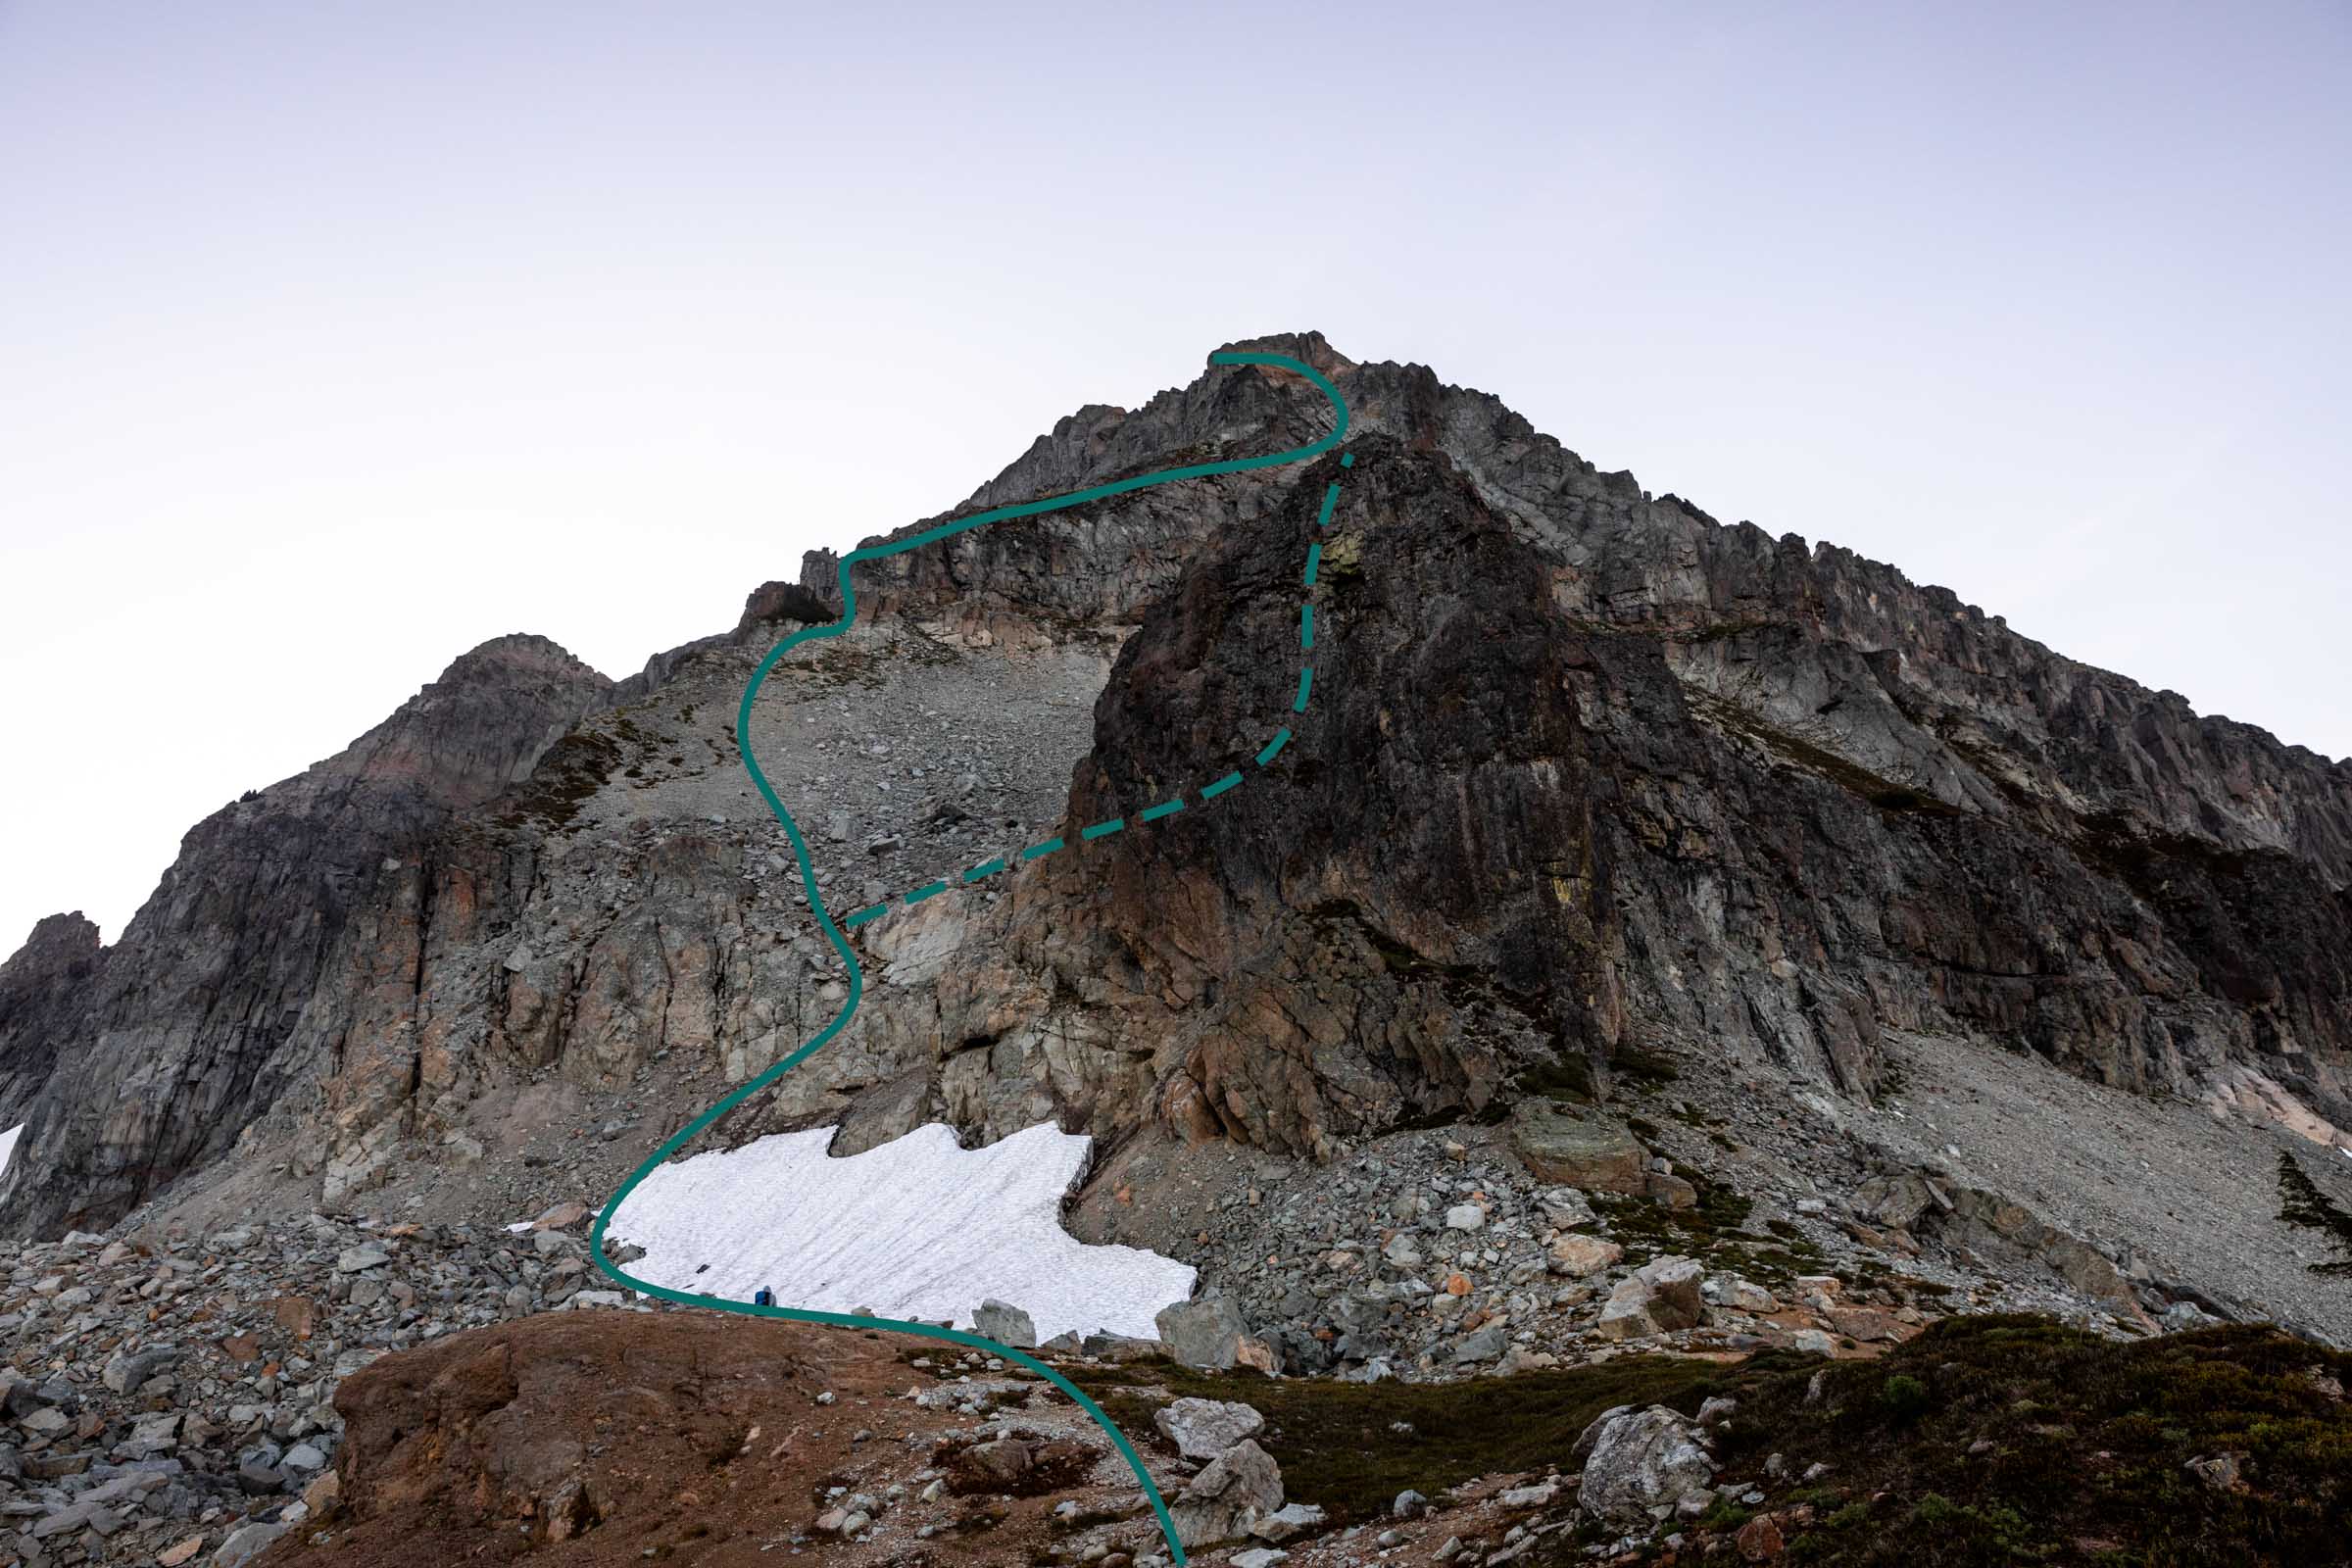
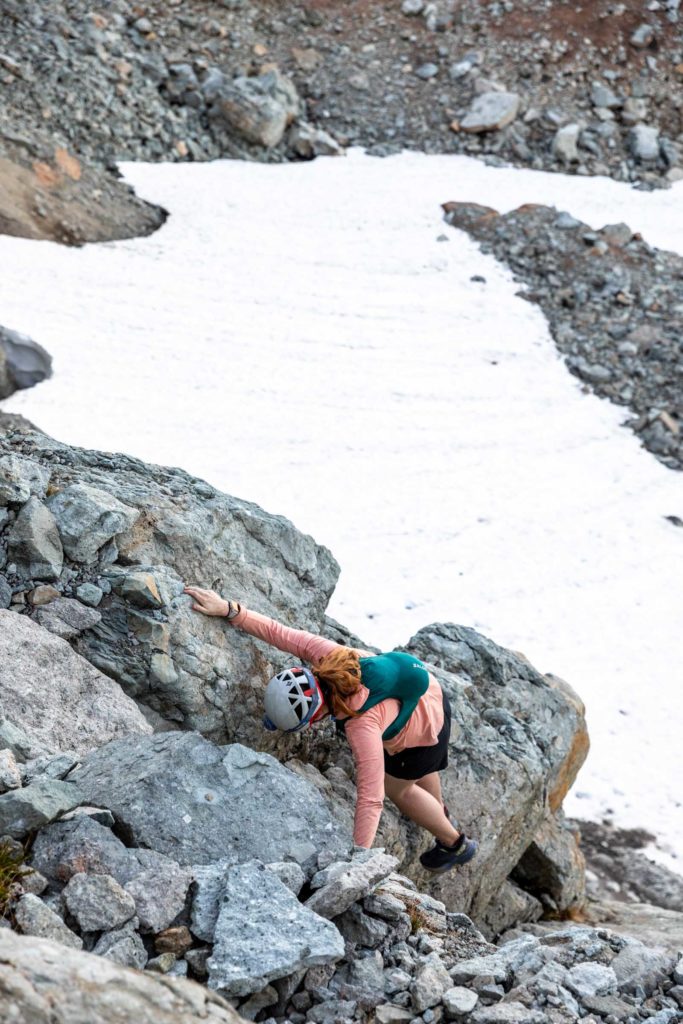
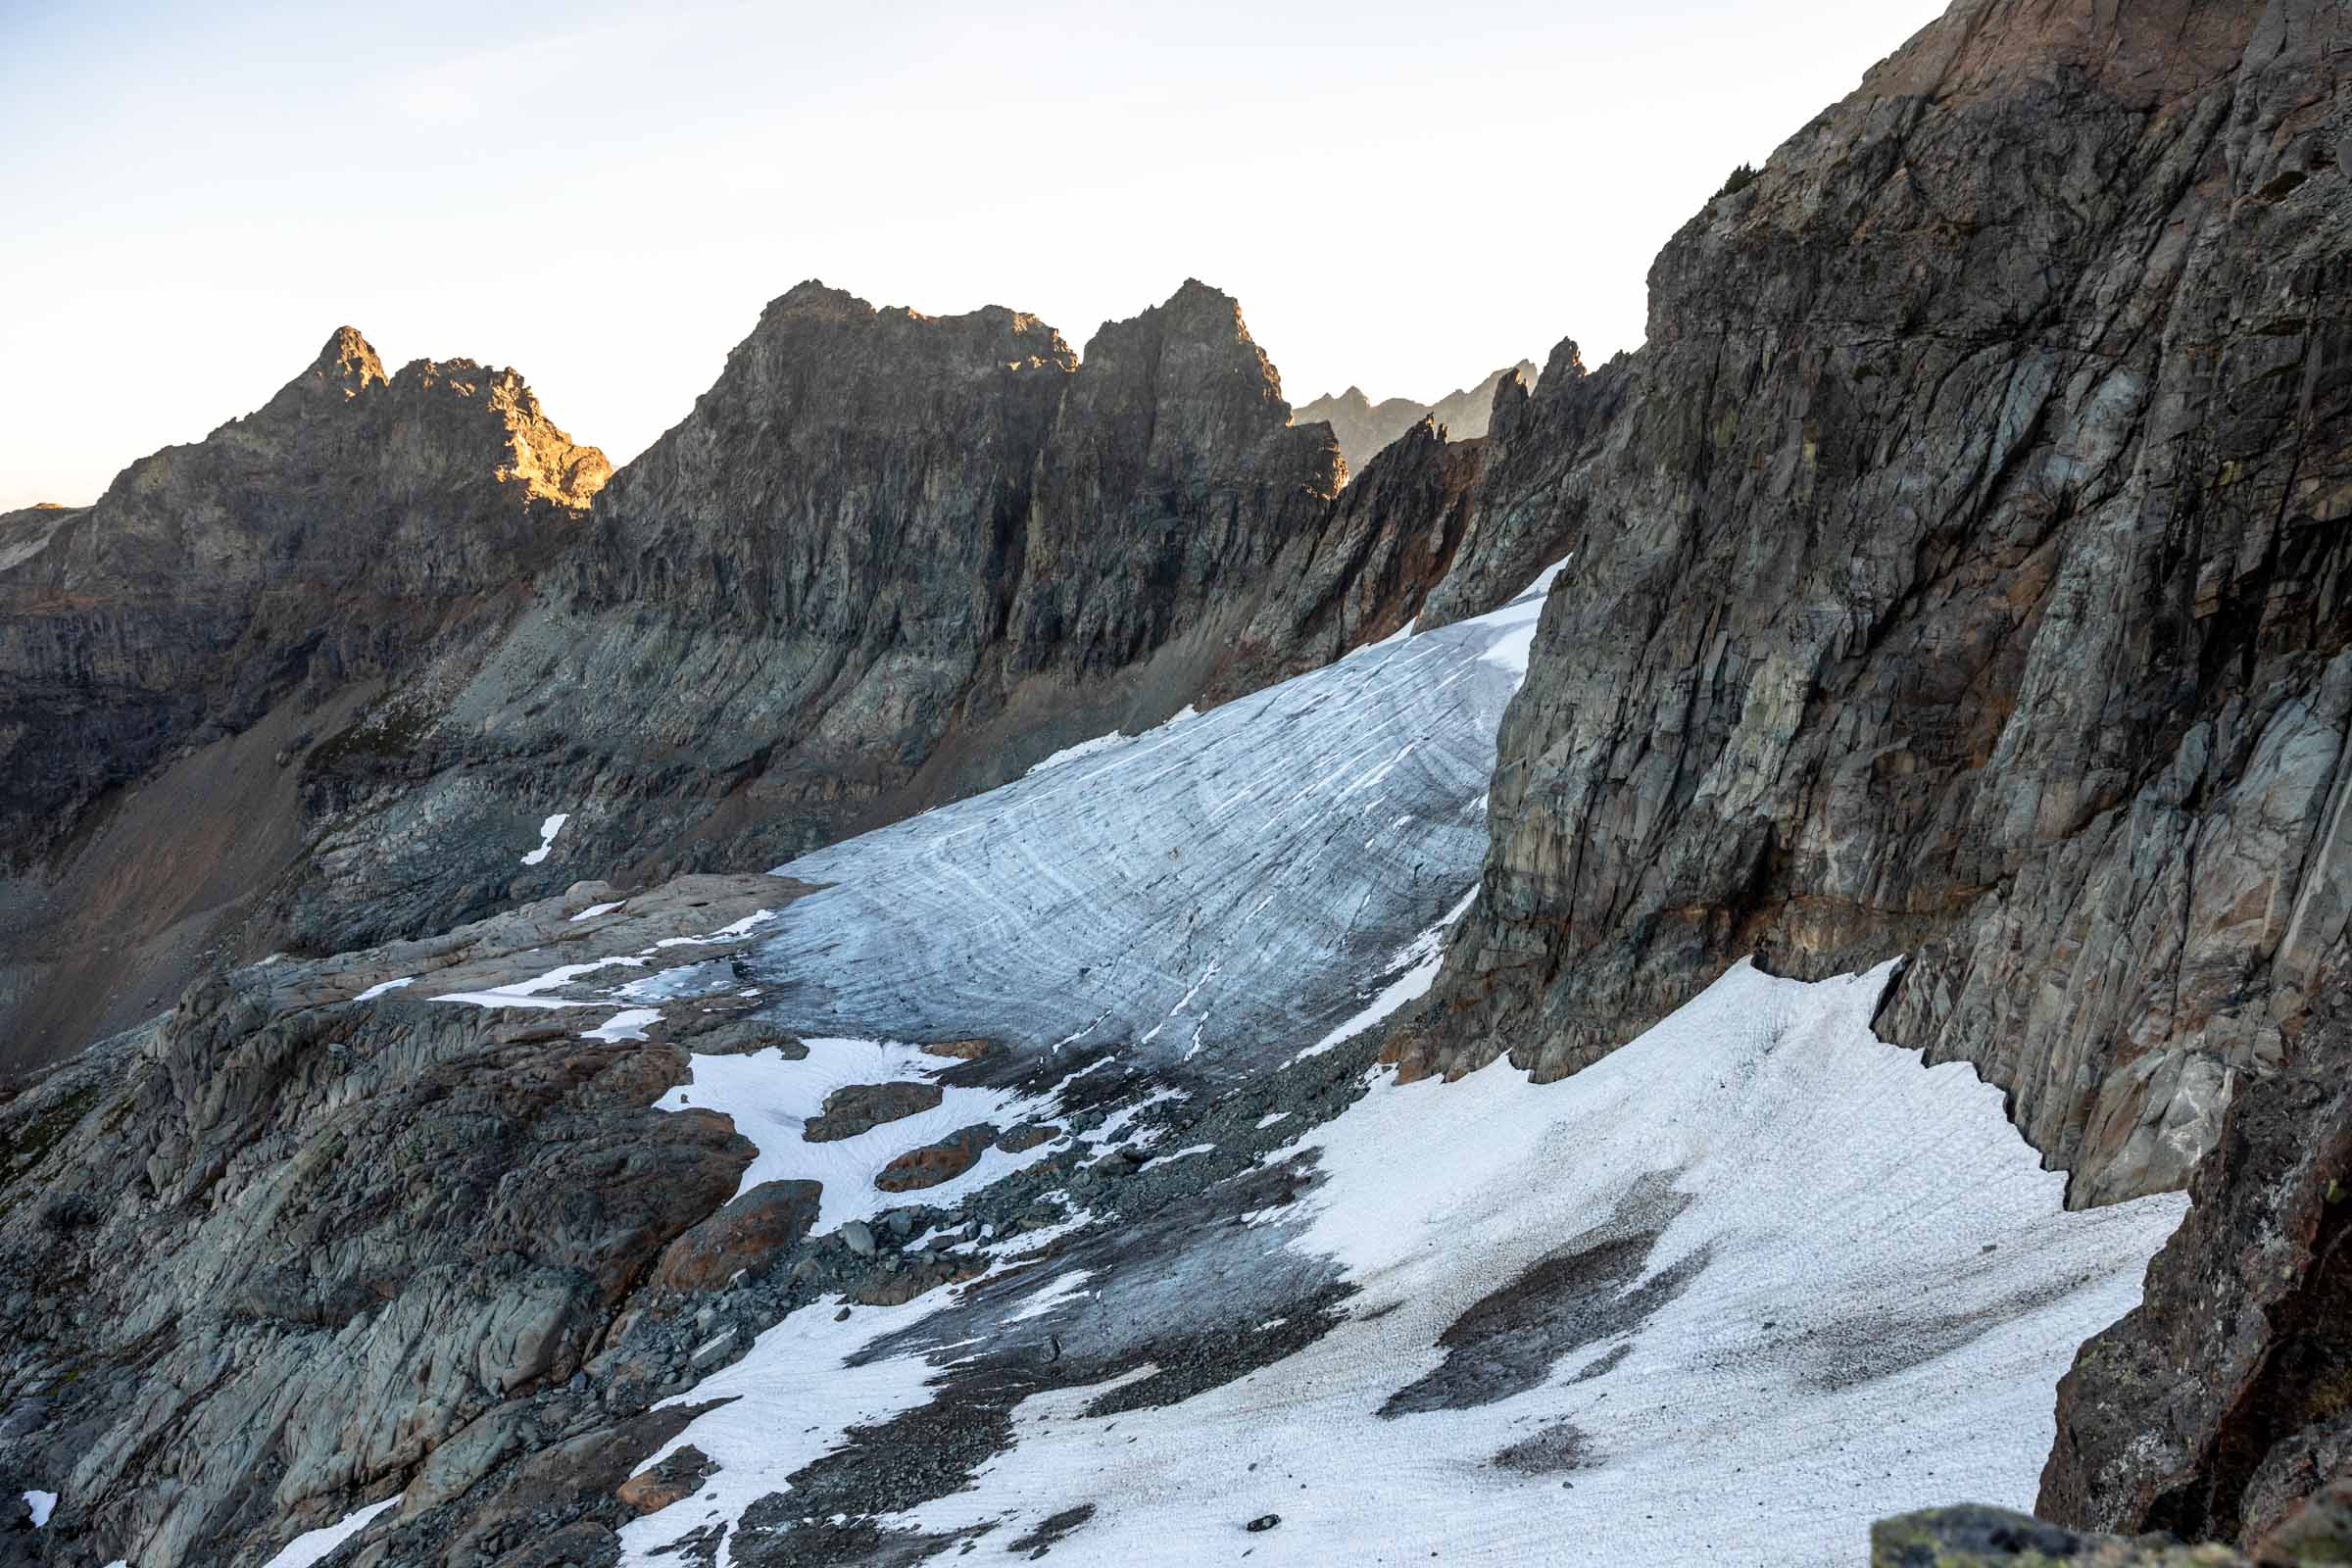
The trail comes in and out and we took it up to a notch which pops you out to a flat area and a view of the first bit of class 3 scrambling and patch of snow. This time of year we could walk around the snow or through. But possibly in earlier seasons, it’d be a short pitch of steep snow. There’s several ways up, find whichever is easiest for you through this 10-20 feet and back onto another large boulder field to navigate. I find the bigger boulders easier to walk on instead of the smaller pieces of cross. Trending left under the cliff band, I found another use trail. Don’t follow it around the buttress. Instead go straight up on the left side of the buttress for a 5 foot class 4 move. Either take the chimney or the crack climb. We all enjoyed the crack climb because the chimney felt more overhung.
Apparently, after consulting other tracks, the buttress was the first we found – stay right next to the wall and then there’s still a class 4, reach-y for short people but otherwise class 3 50 feet of scrambling that’s directly beneath the slabs under the summit block. Both methods work! You can assess which works best for you.
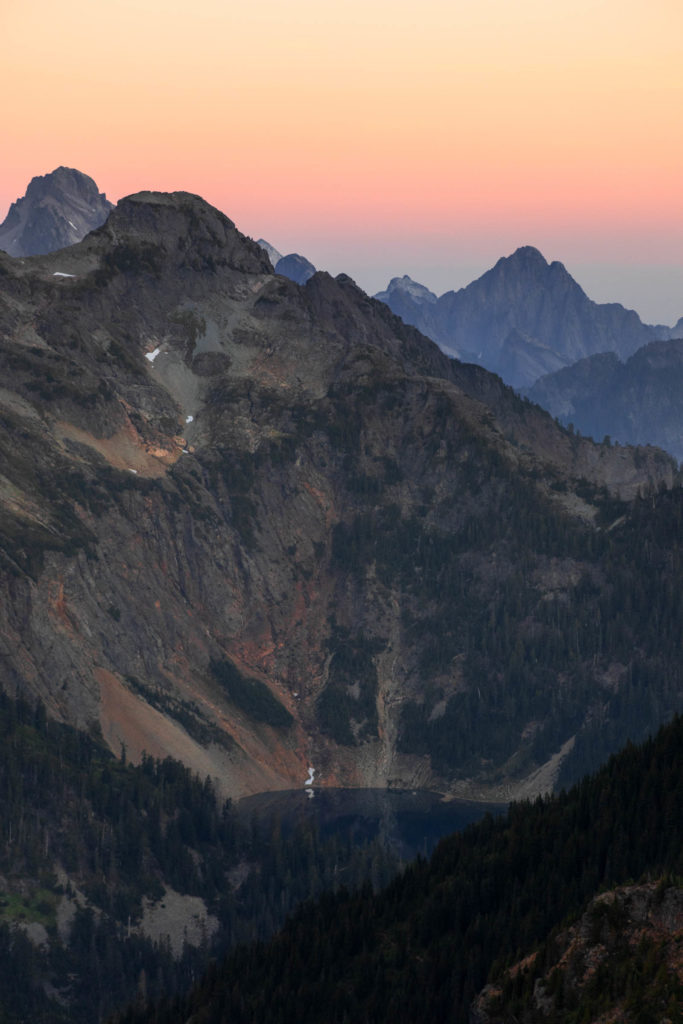
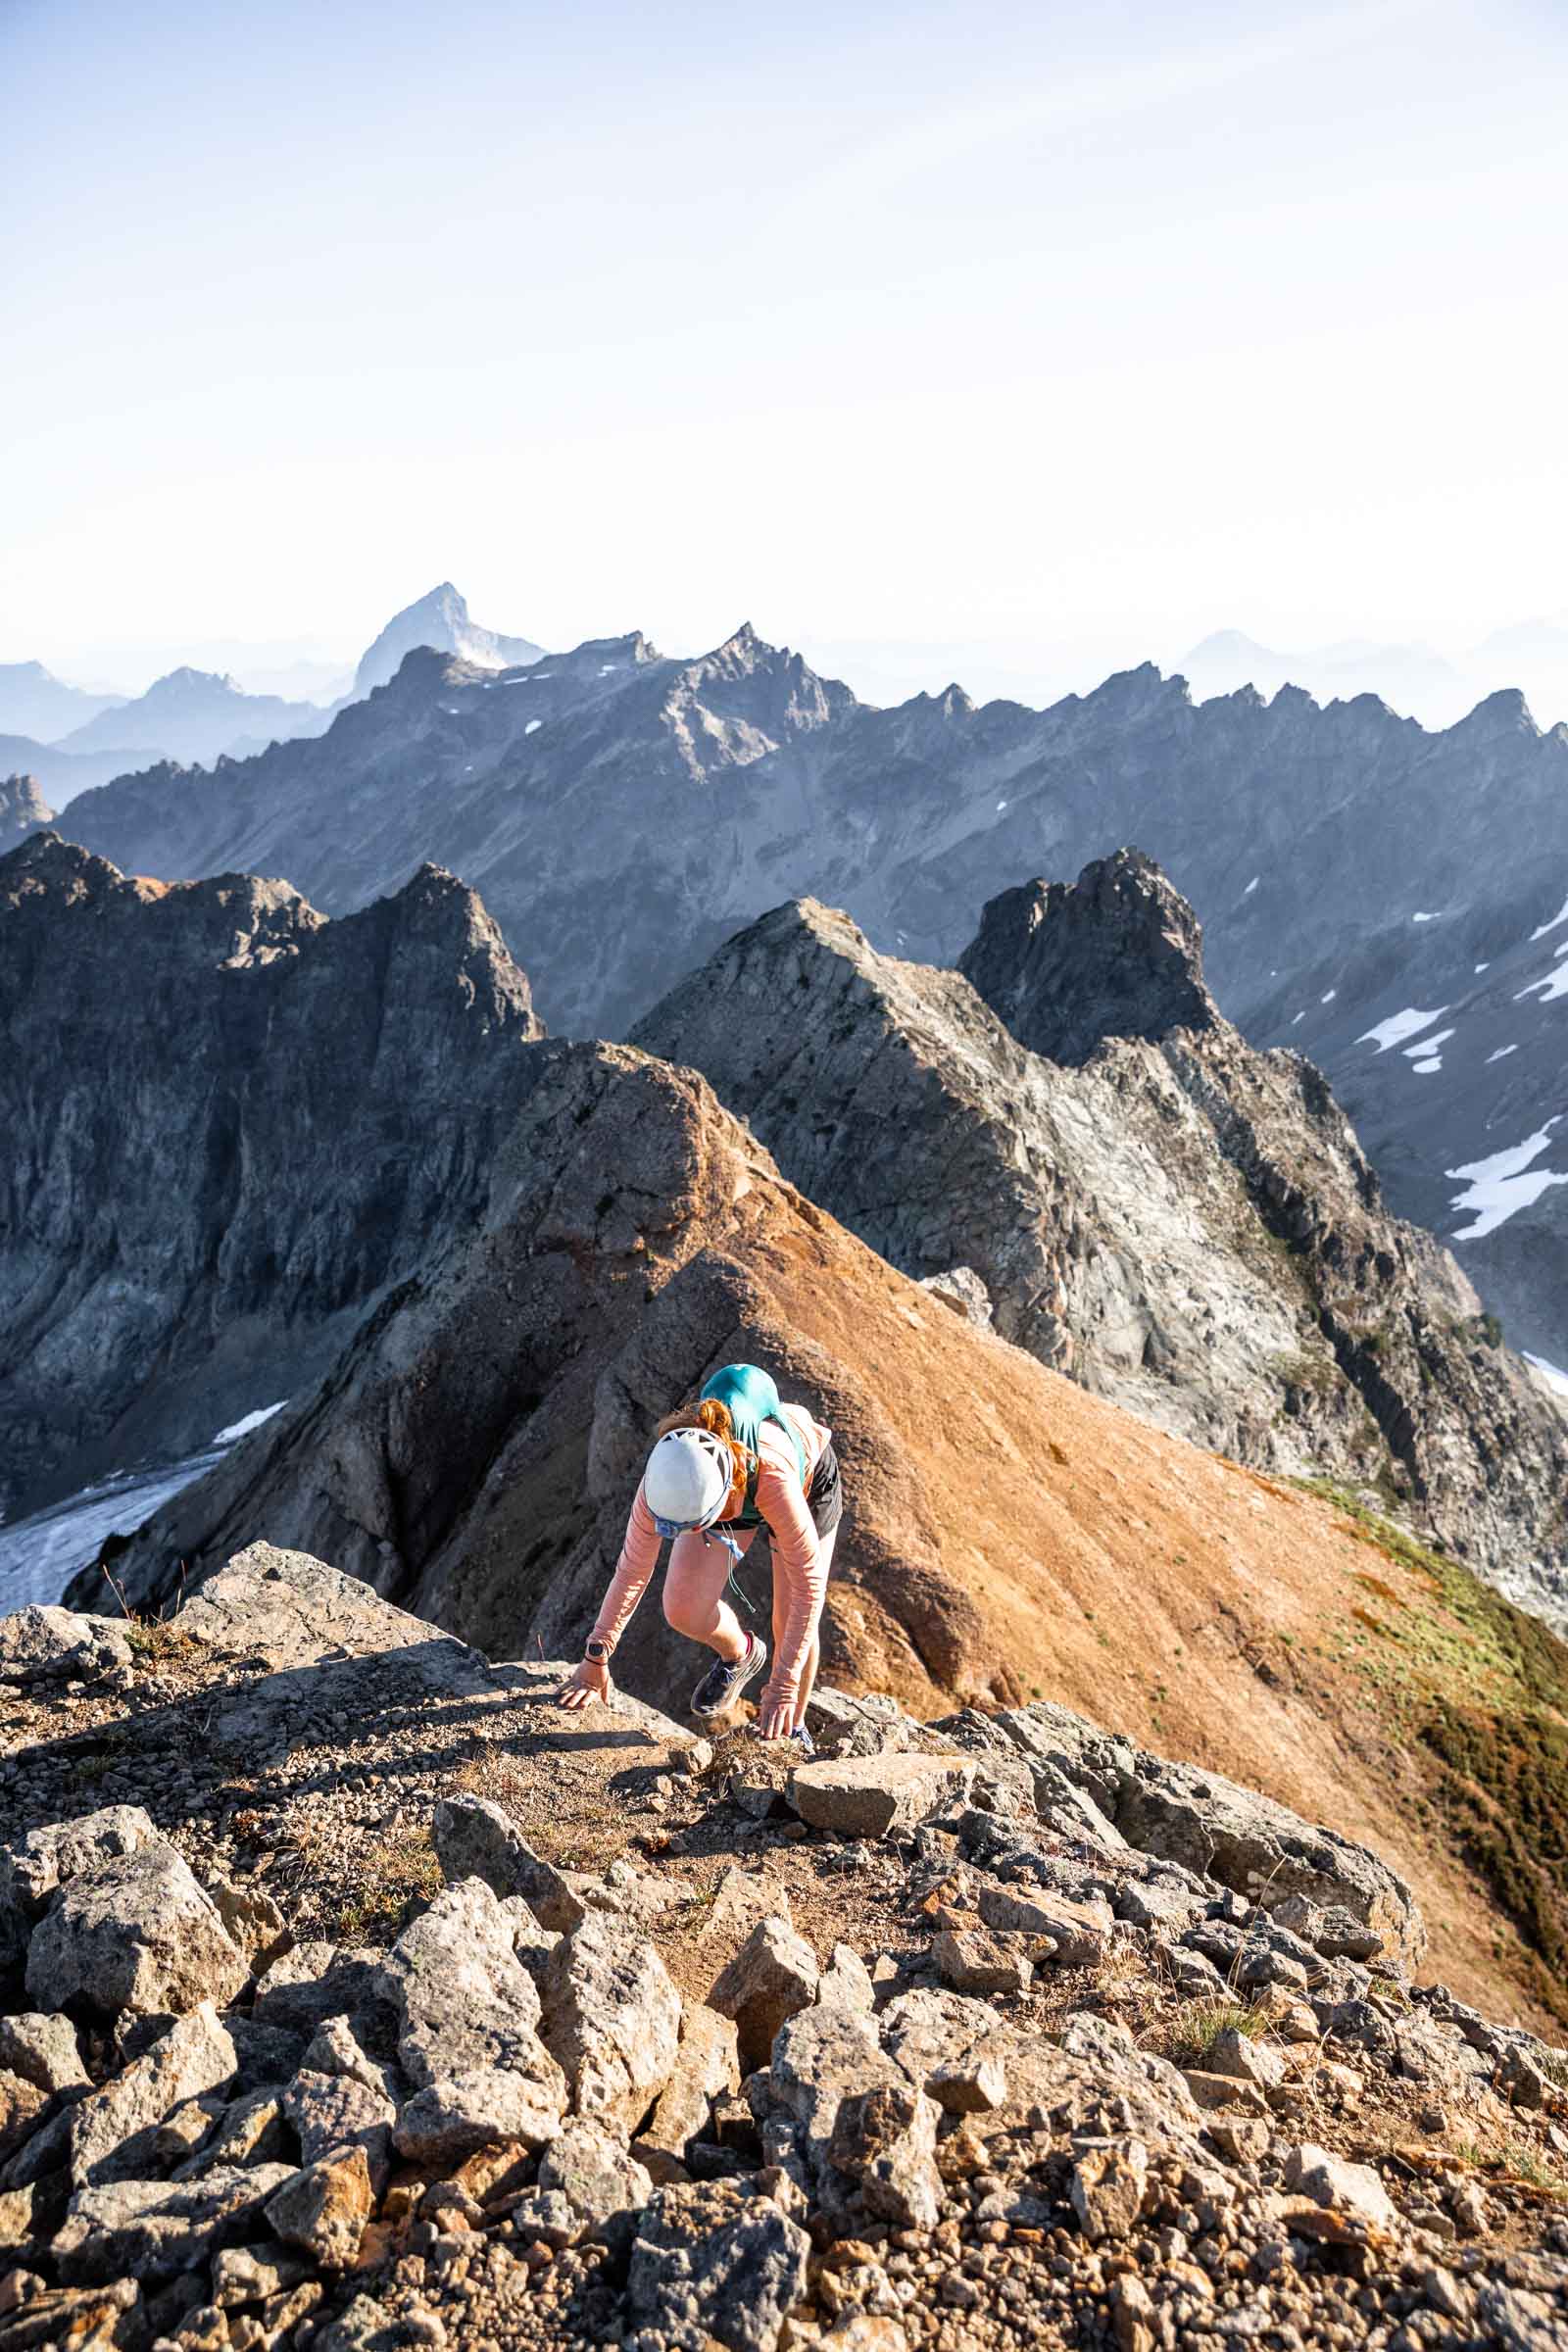
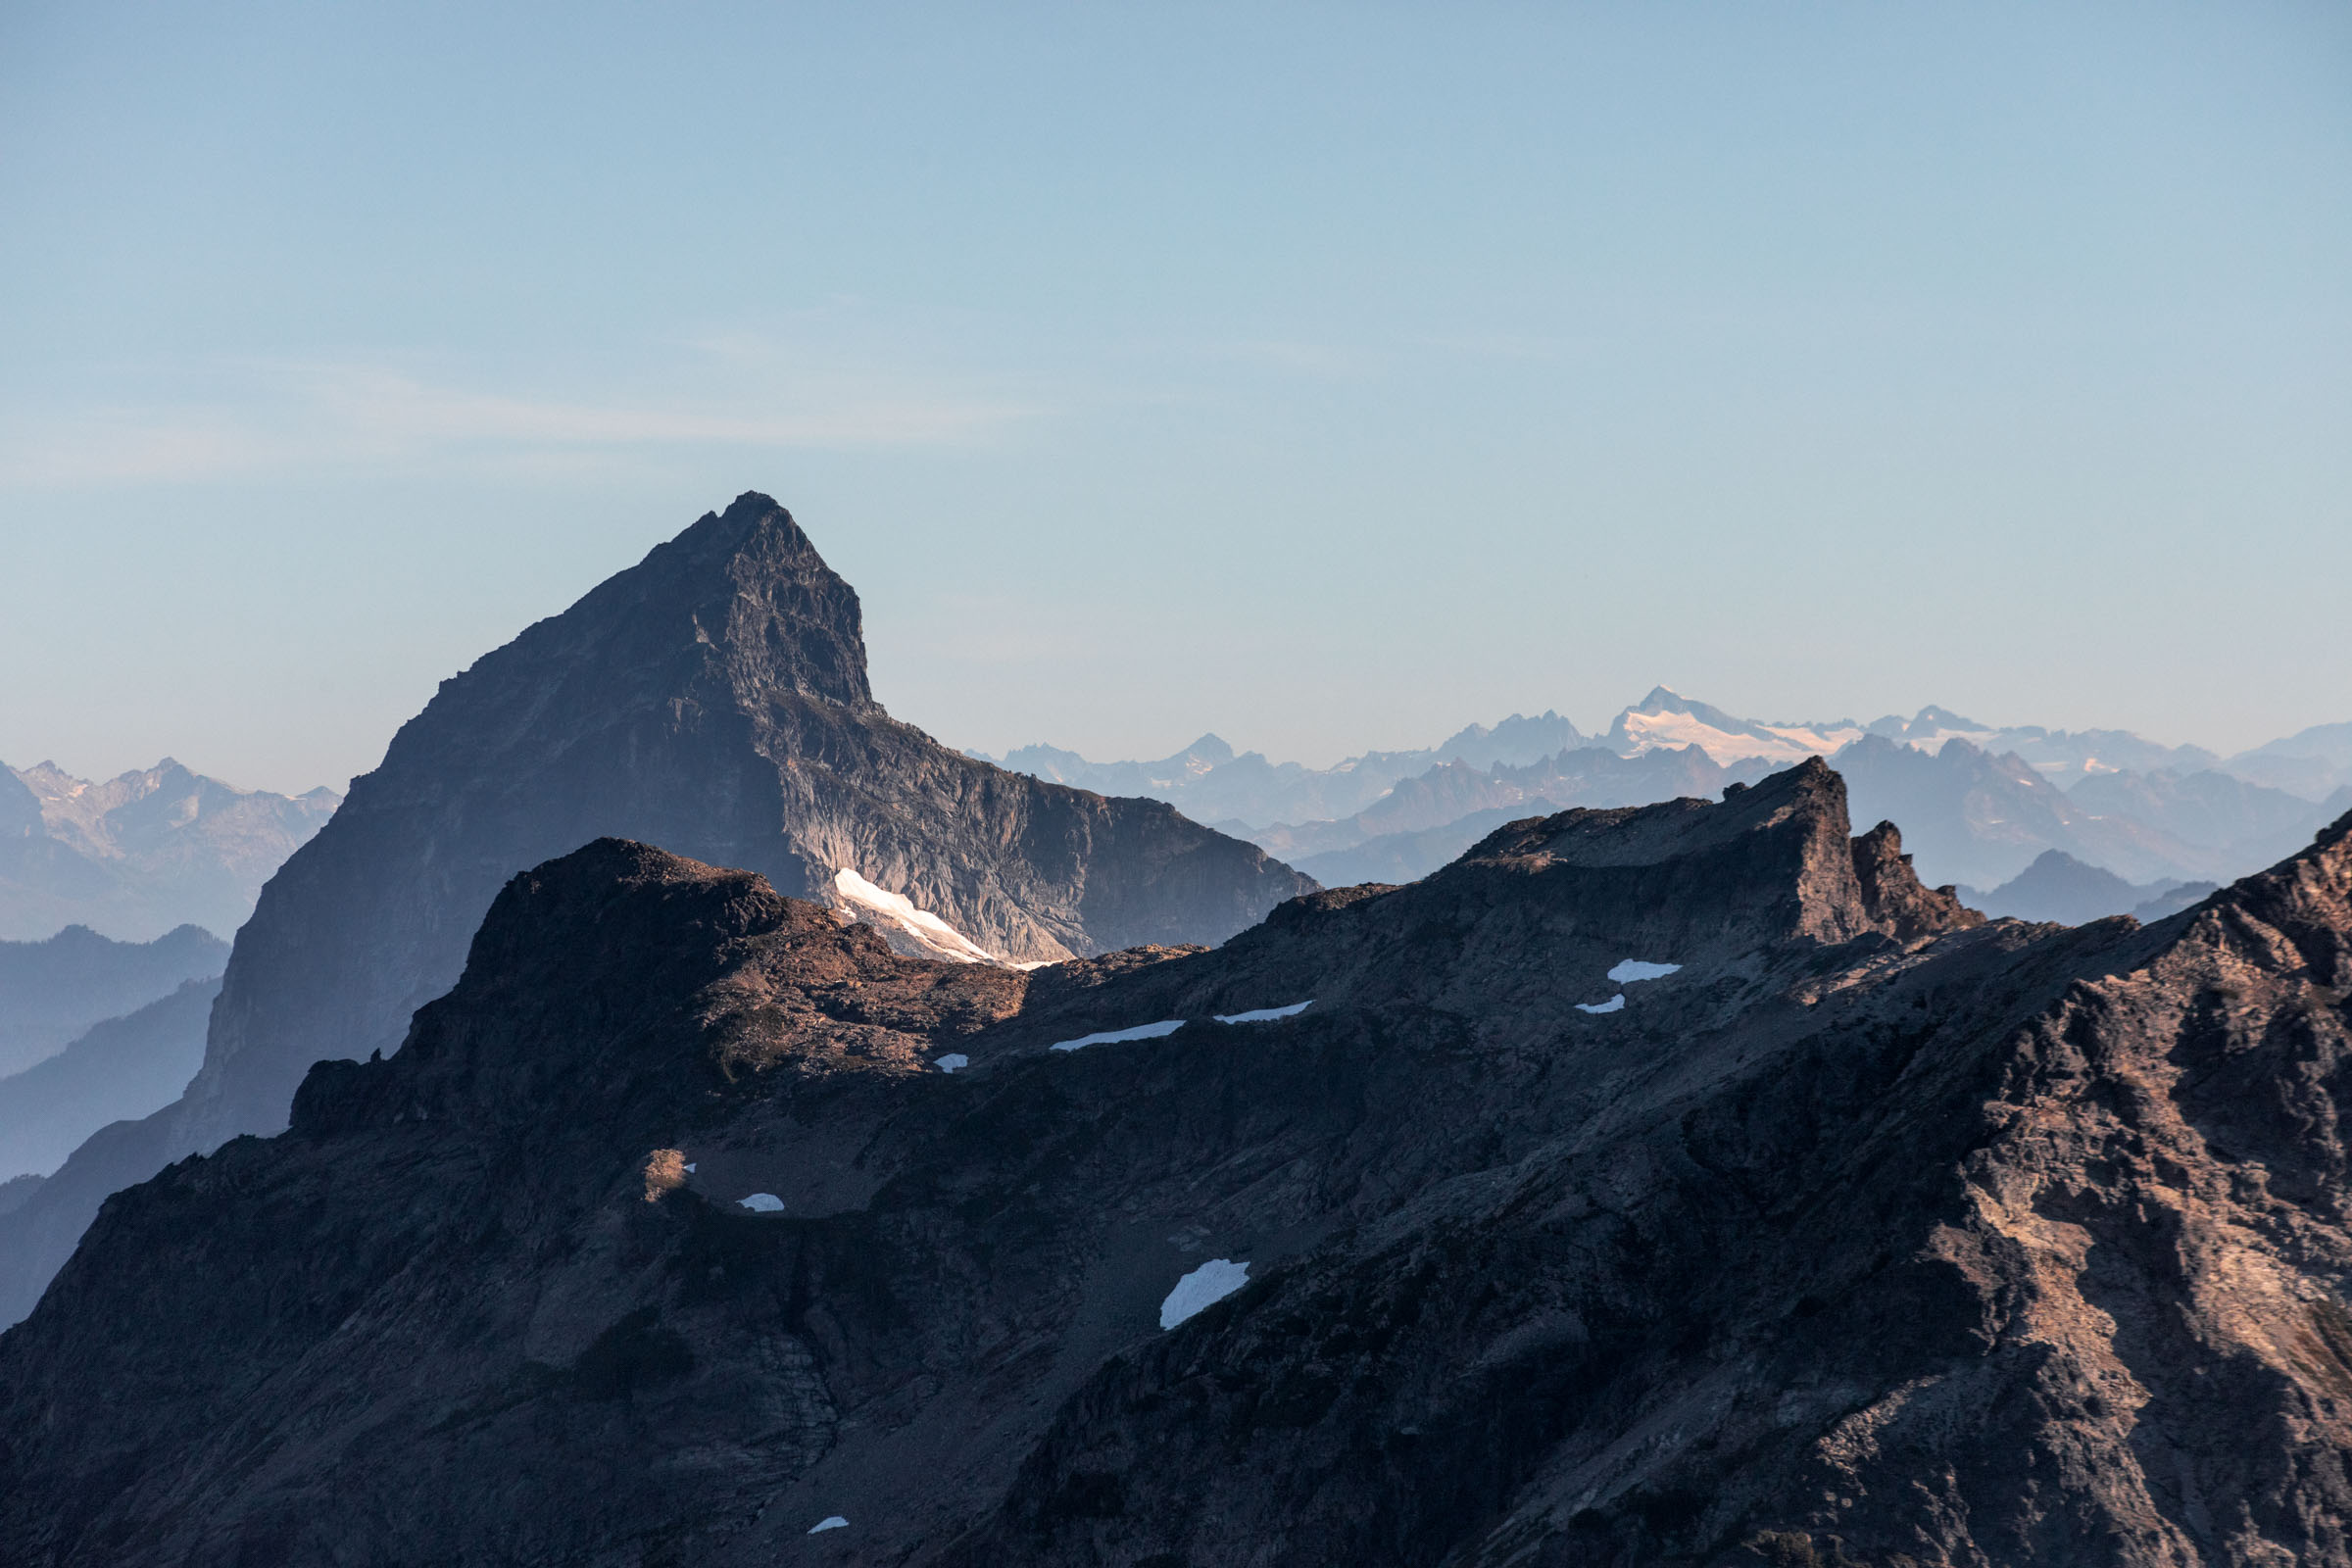
Once on top of the cliff band, we walked along the ridge and found ourselves at the base of the summit block. I think this is what they call the southwest face gully in other reports, but hardly felt like a gully. More like open slabs that felt solid on the way up and a bit scary on the way down. Staying climber’s left, you’ll find some cairns that lead a more solid class 2/3 path up. Once at the top of the slab section (or left of it), we found yet another cliff band. This one we went left around to the north side for the least 30 feet of class 3 scrambling to the summit. By now, the sun was warm and we got to enjoy 360 views! It was so interesting seeing all the Mountain Loop peaks from this angle and remembering how I was climbed Sloan and Baker earlier this year oh and Whitehorse. And of course the other peaks in previous years, like Vesper and Dickerman and Pugh as great day hikes. And don’t forget Three Fingers Lookout! Mountain Loop is simply the most magical place.

While it took about 4 hours going up, it took less than 3 hours to get down. Generally scrambling up and down are similar in time, but factoring route finding, the way up is often longer. We were thankful for the visibility we got overall! The way down was exactly the same for us, except we found some better paths to follow.
Back at our overnight gear, we took a long snack break to rest our bodies and repack. We took this time to recuperate our thoughts and allow relief to settle over us. The trickiest bits were over and we would soon be back at the cars after descending to Monte Cristo and a leisurely river walk back out to the trailhead. We filtered water once more from a stream between Poodle Dog Pass and Monte Cristo, took a long break at a picnic table in town and high tailed it out before smoothies at the van.
I think that this trip was just exactly what we asked for. A chill backpacking experience made more interesting with an alpine start to a summit scramble. It could have been fun to do it in a day and bring bikes but we thoroughly enjoyed the time we spent at the alpine lakes. It’s always the question to prolong a trip for more time to relax or push it one go with lighter packs.
Notes
- Park at the Barlow Pass Trailhead
- It’s a fairly flat walk to Monte Cristo or an easy bike ride via the new trail east of the South Fork Sauk River.
- Enjoy the town of Monte Cristo if you haven’t been. There’s campsites here too. Follow the trail signs to Poodle Dog Pass for a 1.5 miles about 1600 feet up. Take a lunch break at Silver Lake (0.5 miles round trip) or keep going up the ridge towards Twin Lakes.
- Many opt to camp at Silver Lake to avoid the climb out of the Twin Lakes basin, both are beautiful, so if you have the energy, definitely check out Twin Lakes. There’s toilets scattered from the trailhead to Monte Cristo and also at both Silver Lake and Twin Lakes camping areas.
- It was unclear to me if you could follow a trail from East Twin Peaks – we did not follow the faint trail, but we did notice that there’s a trail that visibly leads most of the way between that and the next butte east at 6000 ft. Instead, we dropped into the boulder field north of East Twin Peak around 5300 ft on the upper bench. You could possibly cut the trail lower, but that adds more off trail.
- Cross the boulder field, and start trending up when it feels like it’s getting steeper (in theory you could do this at any time and hit the ridge trail). We took the heather slopes up right next to the cliff band sitting at 5600-5800 ft. This gets you onto the south side trail of the cliff bands.
- Follow the trail until it peters out and continue just south of the ridge. Stay close the ridge when you can. We did not have to cross snow this time of year, but I’d imagine earlier season would hold more snow. For us it was another boulder field with a few feet of class 3 moves at 6400 ft.
- You’ll get to an impasse at 6700 ft where going left around a buttress gets you views of the glacier, but don’t go that way! Take either a chimney move or a solid crack climb up one class 4 move (some may consider class 5) and then you’ll be back on the ridge with some soil-rock class 2 traversing across the southwest face to the base of a slab slope. Some reports call this the gully. Alternate route: stay right and south on the previous boulder field 6400-6800 ft and access a class 4 move that is easier for taller people and enter a gully for 50 ft (beta from friends). This is more class 3 style of class 4.
- At 6900 ft we started going straight up. There’s a decent trail if you stay climber’s left, otherwise take the slabs, which gets quite sketchy with loose rock the higher you go. There’s a couple cairns around here.
- From the slabs, you’ll find another cliff band, go left around and corkscrew up to the true summit on some class 3 moves.
Photos taken on Canon 5D Mark IV

best of singapore

You May Also Like

take it easy | tomyhoi & yellow aster butte overnight
slow and steady | thunder mountain lakes backpacking